
Sometimes elements on a page can exist outside the viewport, and an unintended side effect can be horizontal or sideways scrolling that shows extra whitespace around your design. Not all horizontal scrolling is a bad thing, but if it’s something that doesn’t work with your design, we’ll walk you through how to stop it using Overflow: hidden, responsive design, and mindful interaction setup.
In this lesson you’ll learn:
Why overflow happens
Many things can cause unwanted horizontal scrolling in your design, but generally it's caused by 1 of 2 things:
- The design layout has an element that is sized or positioned in a way that pushes it off the screen and outside the viewport.
- Interaction or animations that start offscreen. For example, you have a Heading flying in from the side. When the page loads, the initial position of the Heading might be off the screen. Even though the Heading ends up in the right spot after the animation has completed, its initial position causes the page to have overflow.


Unwanted horizontal scrolling can be caused by a different scenario than the 2 mentioned above, but layout and animation-related overflow tend to show up the most.
How to detect overflow
Horizontal scrolling isn’t always a bad thing. However, when testing for unwanted horizontal scrolling, be on the lookout for anything that makes your layout look or feel like the boundary (usually the right side of your design) isn't functioning as you would like. In other words, look for extra space or elements hanging off the edge of your design’s boundary as you scroll. You can check for this in the Designer and the published site.
To detect in the Designer whether your project might exhibit unwanted horizontal scrolling:
- Open the Designer
- Scroll left and right to see if any elements overflow outside the viewport
- Grab the edge of the Designer canvas
- Resize the canvas to check for responsiveness and fluidity
Note: If you're using a trackpad or a mobile device, scroll left and right — but if you’re using a mouse wheel, you can generally hold down Shift to scroll left and right.

Read more about how to make your designs responsive.
To detect unwanted overflow in your published site (especially if you have interactions in place):
- Publish your site
- Check if your interactions cause unwanted whitespace to the right of your design (especially on mobile devices)

Extra whitespace commonly occurs with interactions because even after the interaction has completed, the browser still thinks the interaction needs the extra width that was used at the start of the animation.
How to fix overflow issues
You can stop horizontal scrolling in a few ways:
- Use Overflow: hidden
- Consider your layout and whether it’s responsive
- Pay attention to your interaction configuration
- Use alternative fixes
- Set Overflow: hidden on an entire page
Use Overflow: hidden
Set the parent element’s Overflow to hidden:
- Locate the element that’s causing the unwanted horizontal scrolling (e.g., an Image element)
- Select its parent element (e.g., a Section)
- Open Style panel > Size
- Set Overflow to hidden
- Scroll left and right to test whether this has removed your unwanted horizontal scrolling

When you set Overflow to hidden, this means you’re hiding elements that spill outside the parent element’s boundary.

Note: Position: sticky will not work if any parent elements are set to Overflow: hidden.
Consider your layout and whether it’s responsive
It’s always best to design responsively when creating your layout. However, a design might be laid out with a pixel-perfect width on one particular display (typically the designer’s display). This can result in unintended overflowing content when the design is viewed using other viewport sizes.
To test that you’re designing responsively:
- Click the preview icon in the Designer (e.g., click the “eye” icon)
- Grab the edge of the Designer canvas
- Resize the canvas to test responsiveness and fluidity across various viewport widths
- Click the desktop icon to return to the desktop breakpoint and click the preview icon to toggle out of preview mode

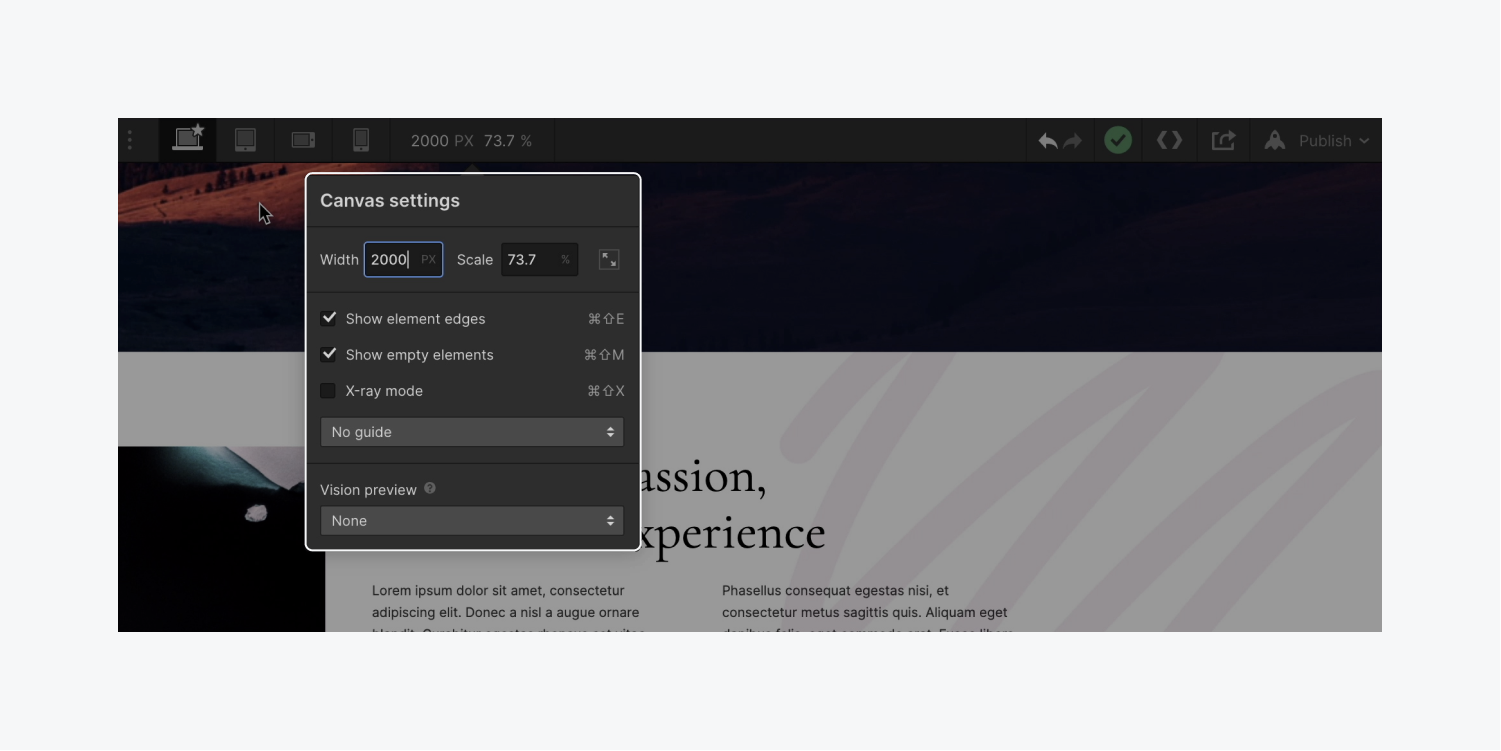
You can also test what your designs will look like on a much larger display:
- Click the canvas dimensions at the top of the Designer to open the Canvas settings
- Type in the exact width of the display size you’d like to preview (e.g., 2000 pixels) and press Return on your keyboard
- Press any of the breakpoint buttons to exit the larger display preview
Read more about how to make your designs responsive.
Pay attention to your interaction configuration
Let’s say you have a Heading with an interaction set on it. The Heading ends up in the correct spot after the interaction has completed, but its initial position is off the page. Because the Heading starts off the page, this initial position causes the page to get stuck in this layout, and introduces unwanted horizontal scrolling.
To stop the unwanted horizontal scrolling that’s introduced because of this interaction:
- Select the Heading’s parent element (e.g., “Hero container” Div block)
- Set the Div block’s Overflow to hidden
This results in the Div block doing what you told it to — it hides anything hanging over its boundary. However, this causes your animation to get clipped.

To make sure the animation still functions as you had intended, you can remove Overflow: hidden on the Div block and instead set Overflow: hidden on the next parent up in the element hierarchy — the Section:
- Select the Heading’s parent element (e.g., “Hero container” Div block)
- Set the Div block’s Overflow to visible
- Select the next parent up in the hierarchy (e.g., “Hero Section”)
- Set the Section’s Overflow to hidden
Now the animation works as expected and your elements no longer overflow.
Use alternative fixes
You can also try the following fixes:
- Using percentage based widths and max widths to prevent overflow (e.g., 100% on parent elements and 100% or less on child elements)
- Using background images for Sections instead of inline Image elements (e.g., if the image is decorative and expected to appear behind text or other content, use a background image)
- Using X-ray mode to more easily see the boundaries of your elements causing overflow (you can toggle X-ray mode in Canvas settings)
- Scrolling through your site in the Designer with your cursor hovering over the extra right side whitespace to identify elements causing overflow
Read more about minimum and maximum dimensions and background images.
Set Overflow: hidden on an entire page
You might wonder if you can set the topmost element’s Overflow to hidden — the Body element.
If you set Overflow to hidden on the Body, this can clip the rest of the content on the page and stop users from being able to successfully scroll through your page beyond what’s initially visible in the viewport.
If you need to set Overflow to hidden on an entire page, an alternative is to use a Div block as a wrapper:
- Open the Add panel
- Drag a Div block onto your page under the Body
- Move all your page elements inside the Div block (e.g., you’re treating the Div block as a wrapper of all your content)
- Select your Div block wrapper
- Open Style panel > Size and set Overflow to hidden (only after moving all your content into the Div block wrapper)

Aren’t you just overflowing with joy now that you’ve figured out how to solve your horizontal scrolling woes? Don’t hide it!
Read more about layout and overflow settings.