Try it: Add custom code
Let’s give it a try. In this lesson, you’ll add a few small pieces of custom code to your site so you can see how code behaves at different levels: inside the layout, on a single page, and across the entire site.
You don’t need a finished site for this. A blank or nearly blank project works just fine. The goal is simply to get hands-on and see custom code in action on a real site.
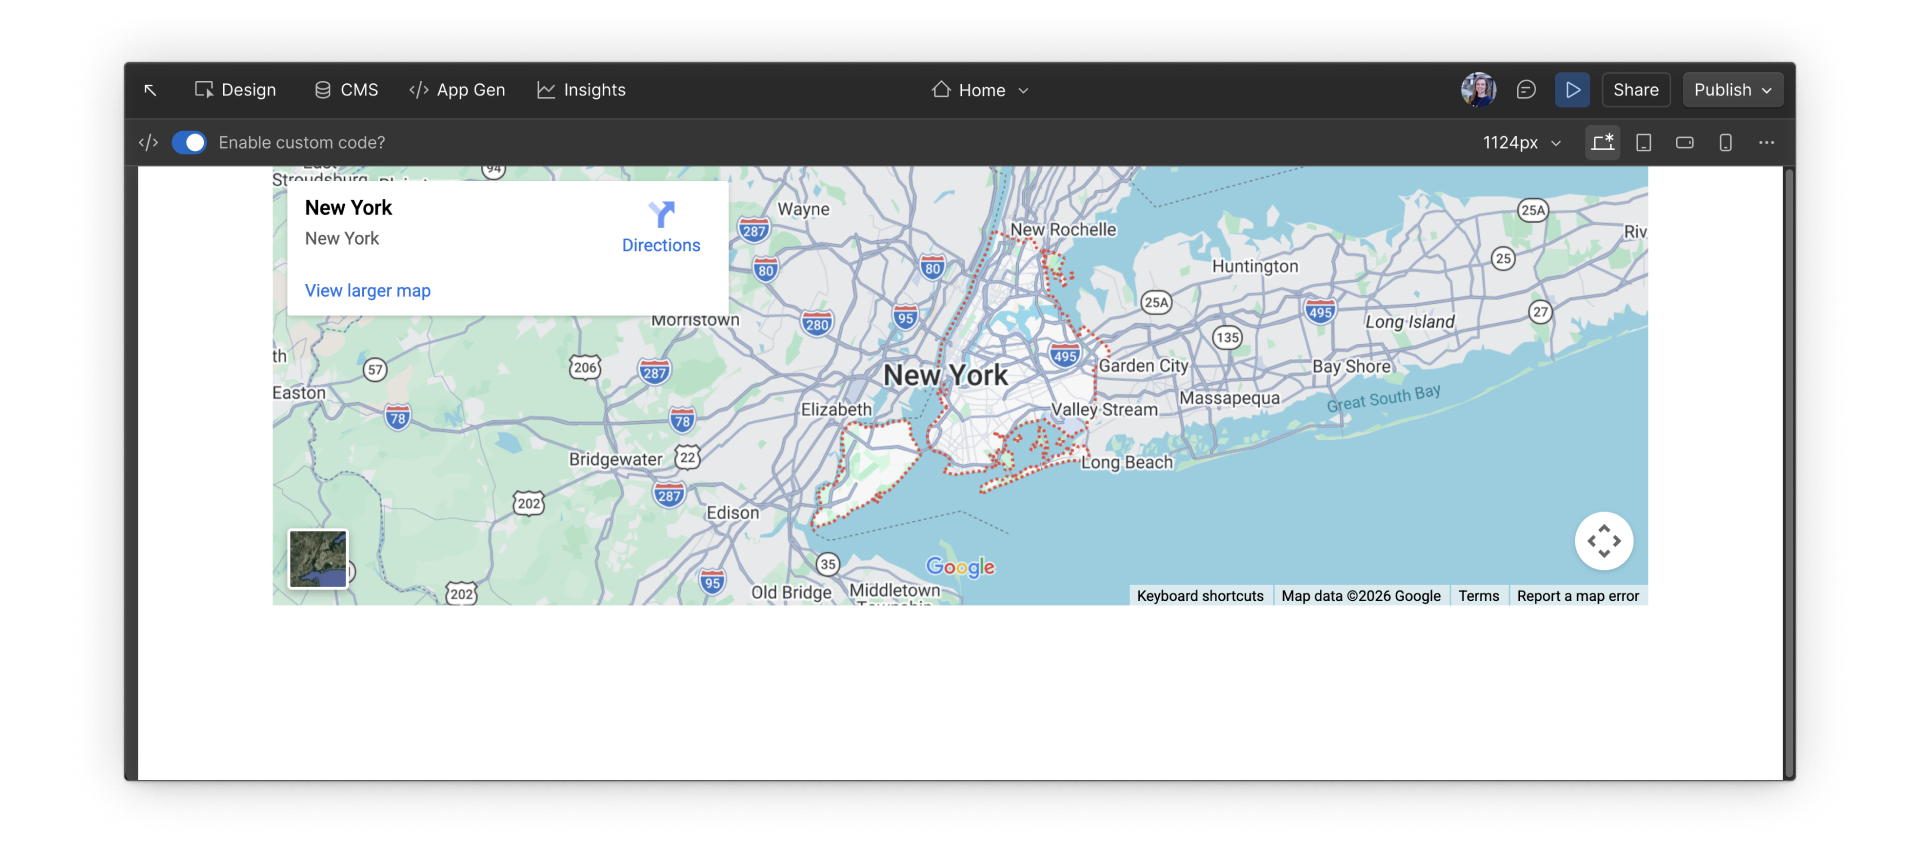
Try it: Layout-level code (map embed)
First, you’ll embed something visible directly into your layout using the Code Embed element.
We’ll use a simple embedded Google Map, and you can place it anywhere on the page.
Step 1: Add a Code Embed element
- Open any page in your site.
- Add a Code Embed element to the page.
- Place it inside a section, container, or div so it has some space.
Step 2: Paste the embed code
Copy and paste the code below into the Code Embed element:
<iframe
  src="https://www.google.com/maps?q=New%20York%20City&output=embed"
  width="100%"
  height="300"
  style="border:0;"
  loading="lazy">
</iframe>
Save and close the embed.
Step 3: Preview the page
Enter Preview mode. If you don’t see the map right away, make sure Enable custom code is turned on.
You’ll know this worked if you see a map showing New York City embedded directly on the page.
Optional next steps:
- Try changing the height value in the code from 300 to 400 and see how it affects the layout.
- Try changing the src url to change the city or address displayed on the map.
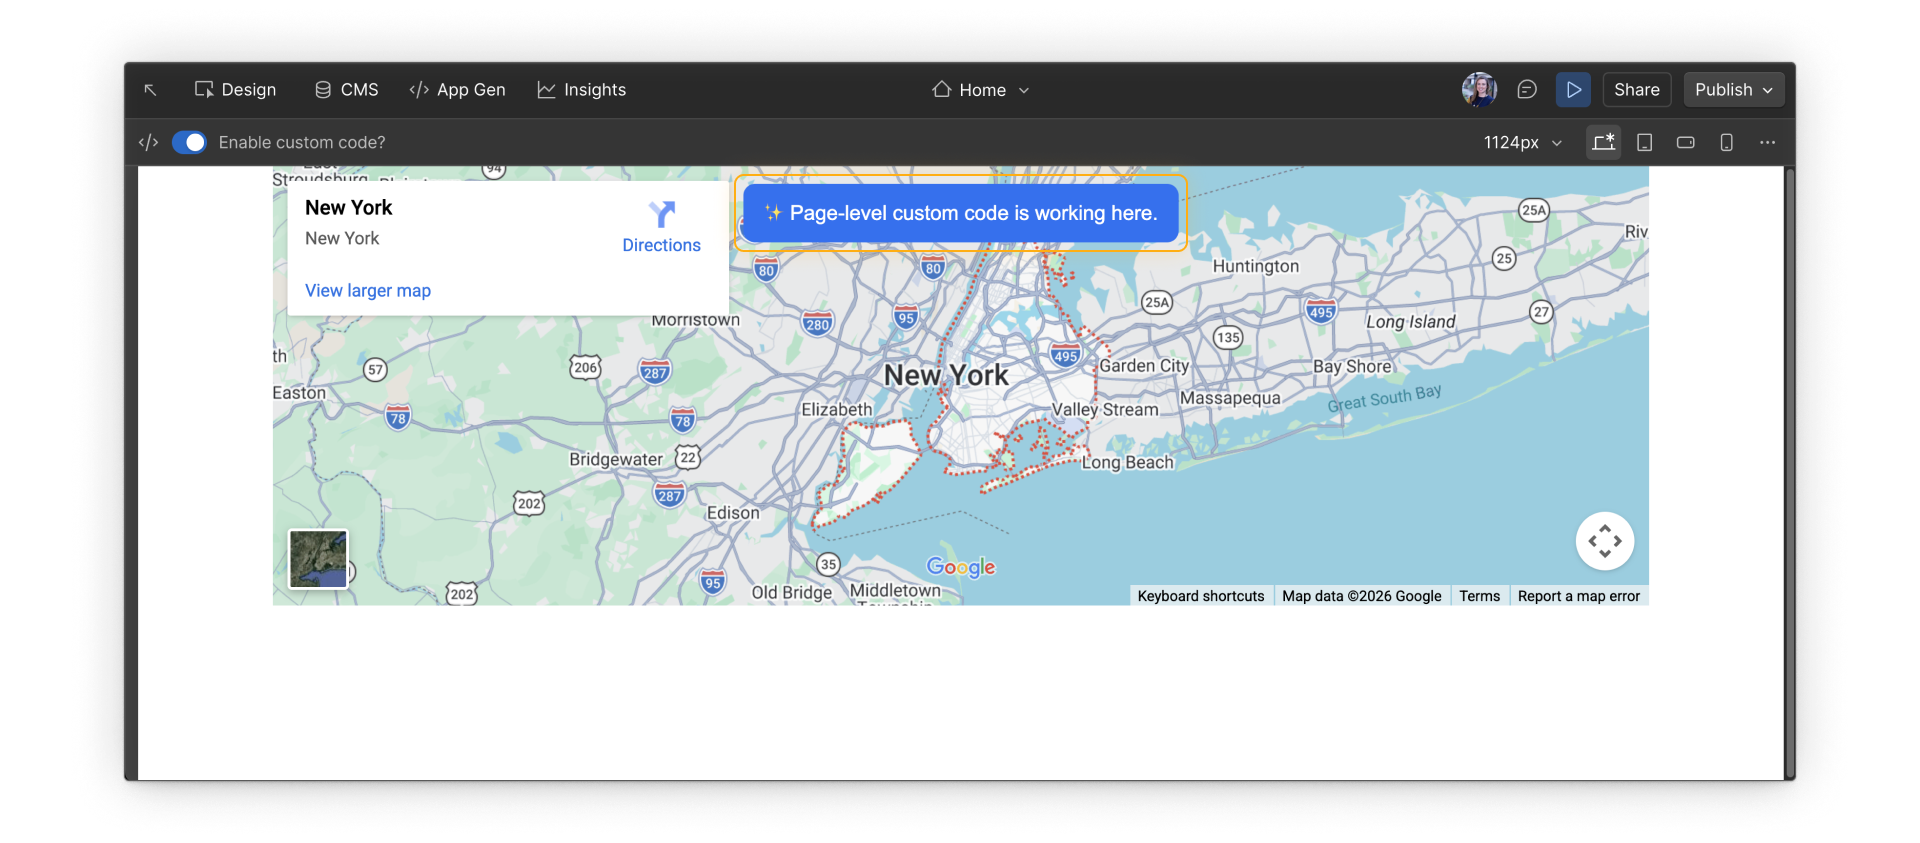
Try it: Page-level custom code (simple banner)
Next, you’ll add a small banner on a single page. You might use something like this for a page-specific announcement, campaign notice, or temporary message.
Step 1: Choose a page
Pick any page in your site. This can be the same page you used above.
Step 2: Open Page settings
- Open the Page settings for that page.
- Scroll to the Custom code section.
Step 3: Paste the script
Paste the code below into the Before </body> tag field:
<script>
  const notice = document.createElement("div");
  notice.textContent = "✨ Page-level custom code is working here.";
  notice.style.cssText = `
    position: fixed;
    top: 12px;
    left: 50%;
    transform: translateX(-50%);
    padding: 10px 14px;
    background: #146EF5;
    color: #FFFFFF;
    font-size: 14px;
    border-radius: 8px;
    z-index: 9999;
  `;
  document.body.appendChild(notice);
</script>
Save the page settings.
Step 4: Publish to staging
Publish your site to staging, then open the page in your browser. Staging is a safe testing environment, so this won’t affect your live site.
You’ll know this worked if:
You see a blue banner at the top of your selected page only.
Optional next steps:
- Try changing the message text (content within the banner).
- Try changing the banner style by adjusting the CSS properties for color, font-size, or border-radius.
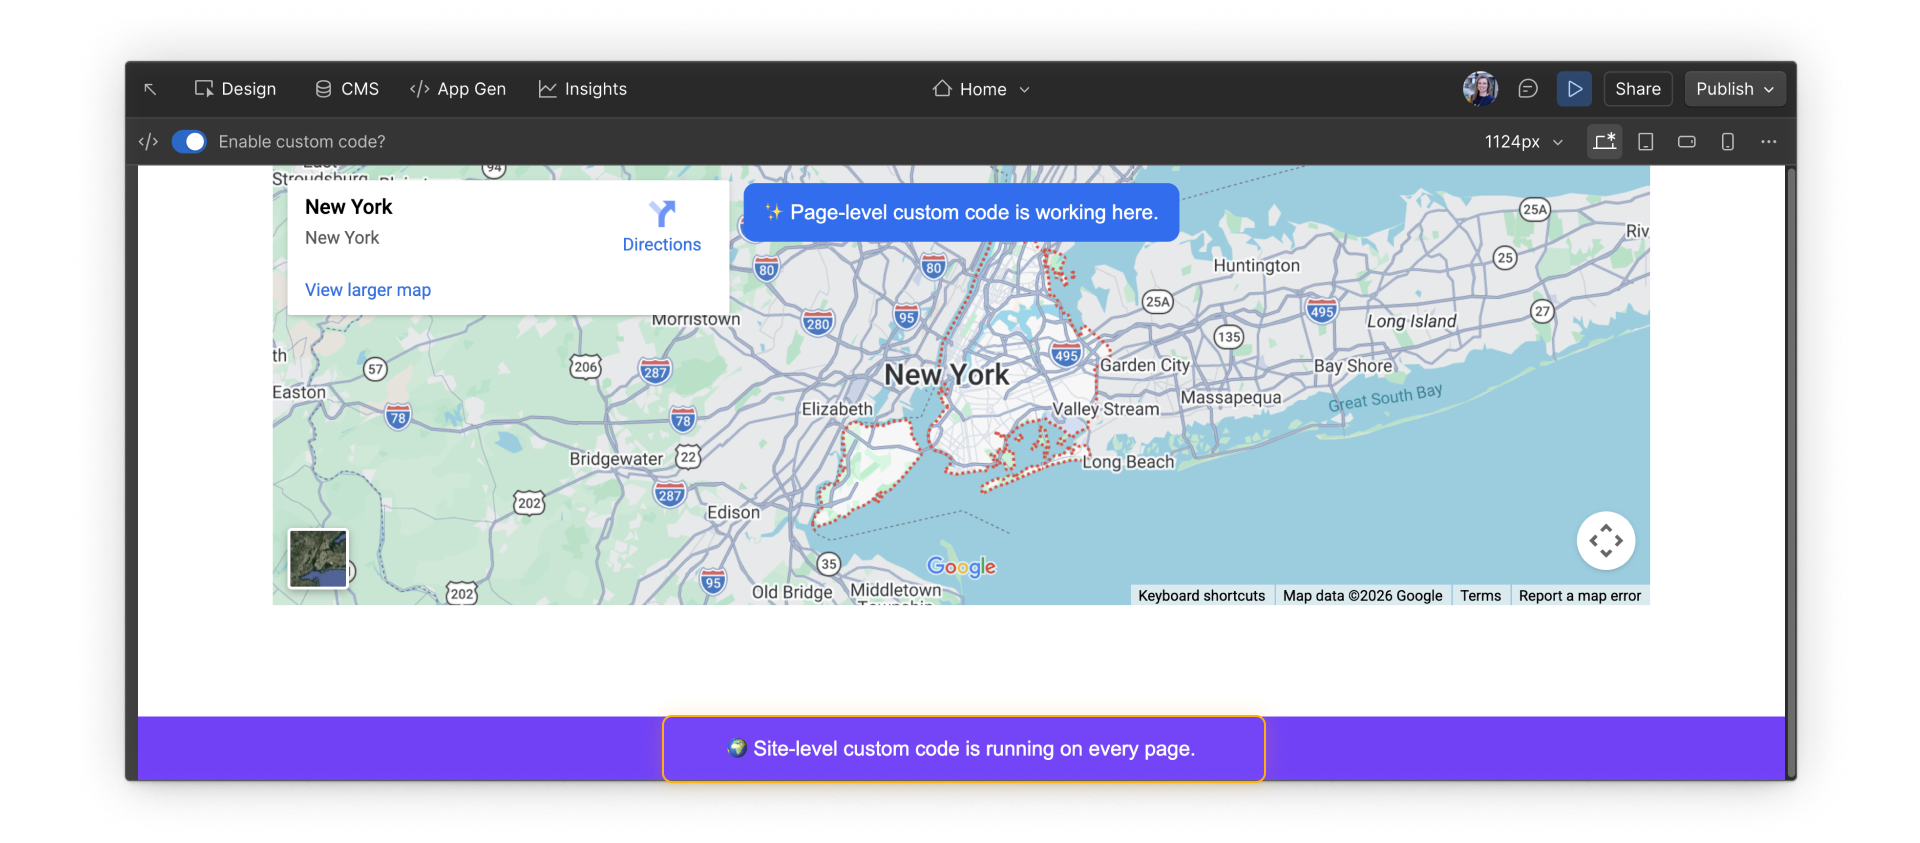
Try it: Site-level custom code
Finally, you’ll add a small banner that appears on every page of your site. You’d use something like this for cookie notices, site-wide announcements, or temporary alerts.
Step 1: Open Site settings
- Go to Site settings.
- Click the Custom code tab from the menu on the left.
Step 2: Paste the code
Paste this code into the Footer code field:
<script>
  const banner = document.createElement("div");
  banner.textContent = "🌍 Site-level custom code is running on every page.";
  banner.style.cssText = `
    position: fixed;
    bottom: 0;
    left: 0;
    right: 0;
    padding: 12px 16px;
    background: #7A3DFF;
    color: #FFFFFF;
    font-size: 14px;
    text-align: center;
    z-index: 9998;
  `;
  document.body.appendChild(banner);
</script>
Save your changes.
Step 3: Publish to staging
Publish your site to staging, then open any page in your browser. Staging is a safe testing environment, so this won’t affect your live site.
You’ll know this worked if:
- You see a purple banner at the bottom of every page.
- On the page where you added page-level code, you see both the blue banner (page-level) and the purple banner (site-level).
- On all other pages, you see only the purple banner.
Optional next steps:
- Try changing the message text (content within the banner).
- Try changing the banner position by adjusting CSS property values for bottom, left, or right.
- Remove the code and republish to see the banner disappear everywhere.
Almost there.
In the final section, we’ll wrap up the course and point you to additional resources for continued learning.