Locale navigation
How users reach the right locale
Now that you’ve translated and localized your content, let’s make sure visitors can easily reach the version that’s right for them and how they can switch if they prefer another language or region.
Webflow offers two main ways to handle this:
- Automatic locale routing: Routes visitors to the correct locale based on their browser settings.
- Manual locale switching: Gives visitors a menu or dropdown to choose their preferred language or region.
Together, these features create a smooth, intuitive experience for global users — whether they expect your site to match their browser language automatically, or want to switch manually once they arrive.
Automatic locale routing
Automatic locale routing detects a visitor’s browser language preference and sends them directly to the most relevant version of your site.
For example:
- A visitor with their browser set to French (Canada) visits mywebsite.com.
- Webflow automatically routes them to mywebsite.com/fr-ca/.
If their browser language doesn’t match any of your published locales, Webflow shows your primary locale instead.
You can enable or disable locale routing per locale in your Project Settings → Localization tab.
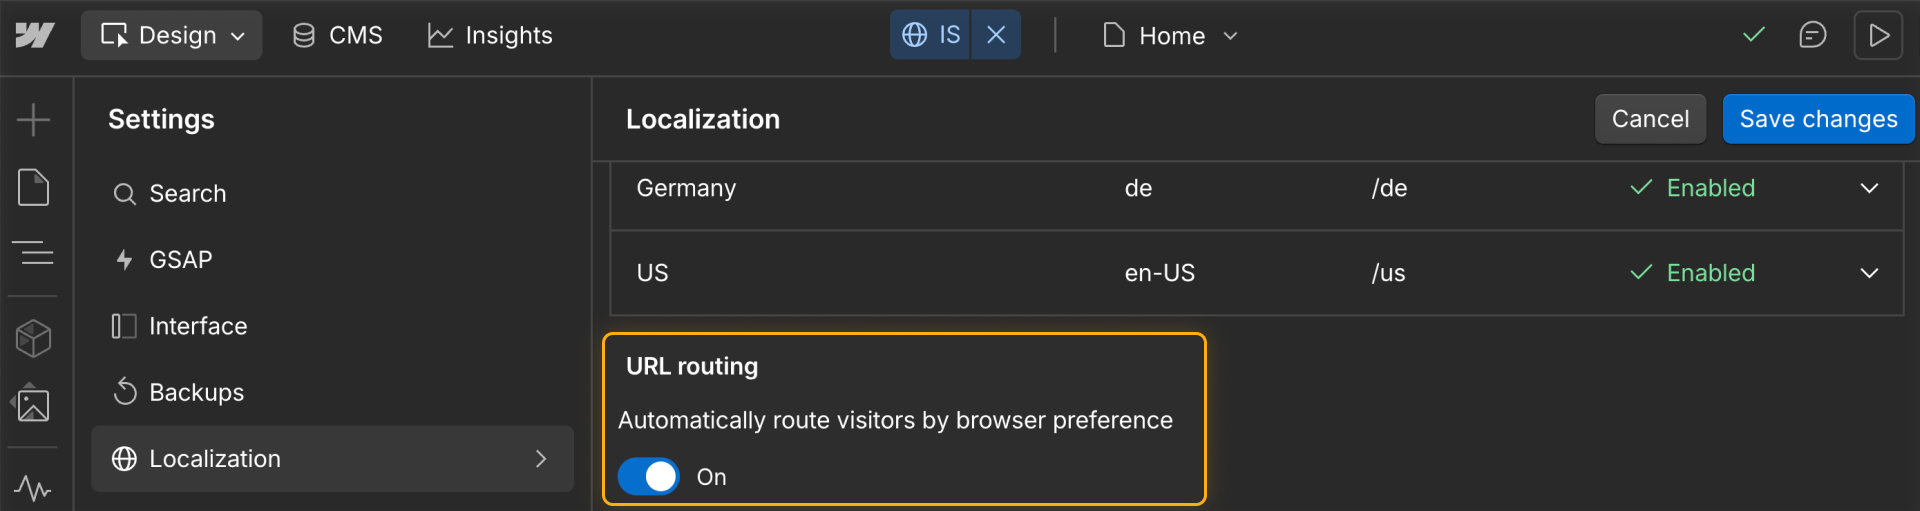
Tip: Routing is great for convenience, but not every audience prefers automatic detection. It’s best paired with a visible locale switcher so users always have control.
Manual locale switching
A locale switcher lets visitors manually choose their preferred language or region — often from your site’s navbar, footer, or menu.
This ensures visitors can:
- Switch to another language if automatic routing doesn’t match their preference
- Explore your content in different locales
- Feel confident they’re viewing the most relevant version of your site
A switcher can be as simple as a dropdown list of languages, or it can include icons or flags for a more visual cue.
.png)
Example: Someone routed to your French version might still prefer to read in English — your locale switcher makes that possible.
Best practices for locale navigation
- Combine routing and switching. Automatic detection saves clicks; a manual switcher gives users control.
- Keep it visible. Place your locale switcher in a familiar, accessible spot (like the top right of your nav).
- Label clearly. Use the locale’s native language name (for example, “Français” instead of “French”).
- Test your flow. Preview each locale and ensure both routing and switching behave as expected.
Tip: If you’re testing new locales that aren’t ready for the public, keep automatic routing disabled until you’re ready to publish.
Ready to move on?
Now that you understand how users navigate between locales, let’s build a locale switcher together.