Best practices
Map out your team first
You’ve seen how seats, roles, custom roles, and granular access work together. Before you start inviting people, map out what each person actually needs to do. Consider the following questions when mapping out your team:
- What does this person actually need to do? Are they designing pages, creating components or design systems, adding custom code, building campaigns, editing CMS content, reviewing work, or managing Workspace settings?
- Does a default role already fit? If it does, use it. If not, which default role is the closest starting point for a custom role?
- What publishing access do they need? Do they need to publish the full site to production, publish to staging only, publish CMS items, require approval, or not publish at all?
- Where should they be able to work? Do they need the whole site, or only specific pages, CMS collections, or locales?
- What should they explicitly not be able to do? For example, should a junior Designer be kept out of design system settings, or should a Content Editor be able to draft without publishing?
You don't need to make the setup perfect forever. Start with what someone needs today, then update it as their responsibilities change.
Plan out your custom roles before you build them.
Use the Custom Role Configuration Tool to map your team members' responsibilities to the permissions they need, then use the recommended settings as a starting point to create your custom roles for your team in Webflow.
Example: a fully mapped-out team
Here's what a mapped-out Enterprise team might look like once you've considered seat type, role, publishing permissions, and access control.
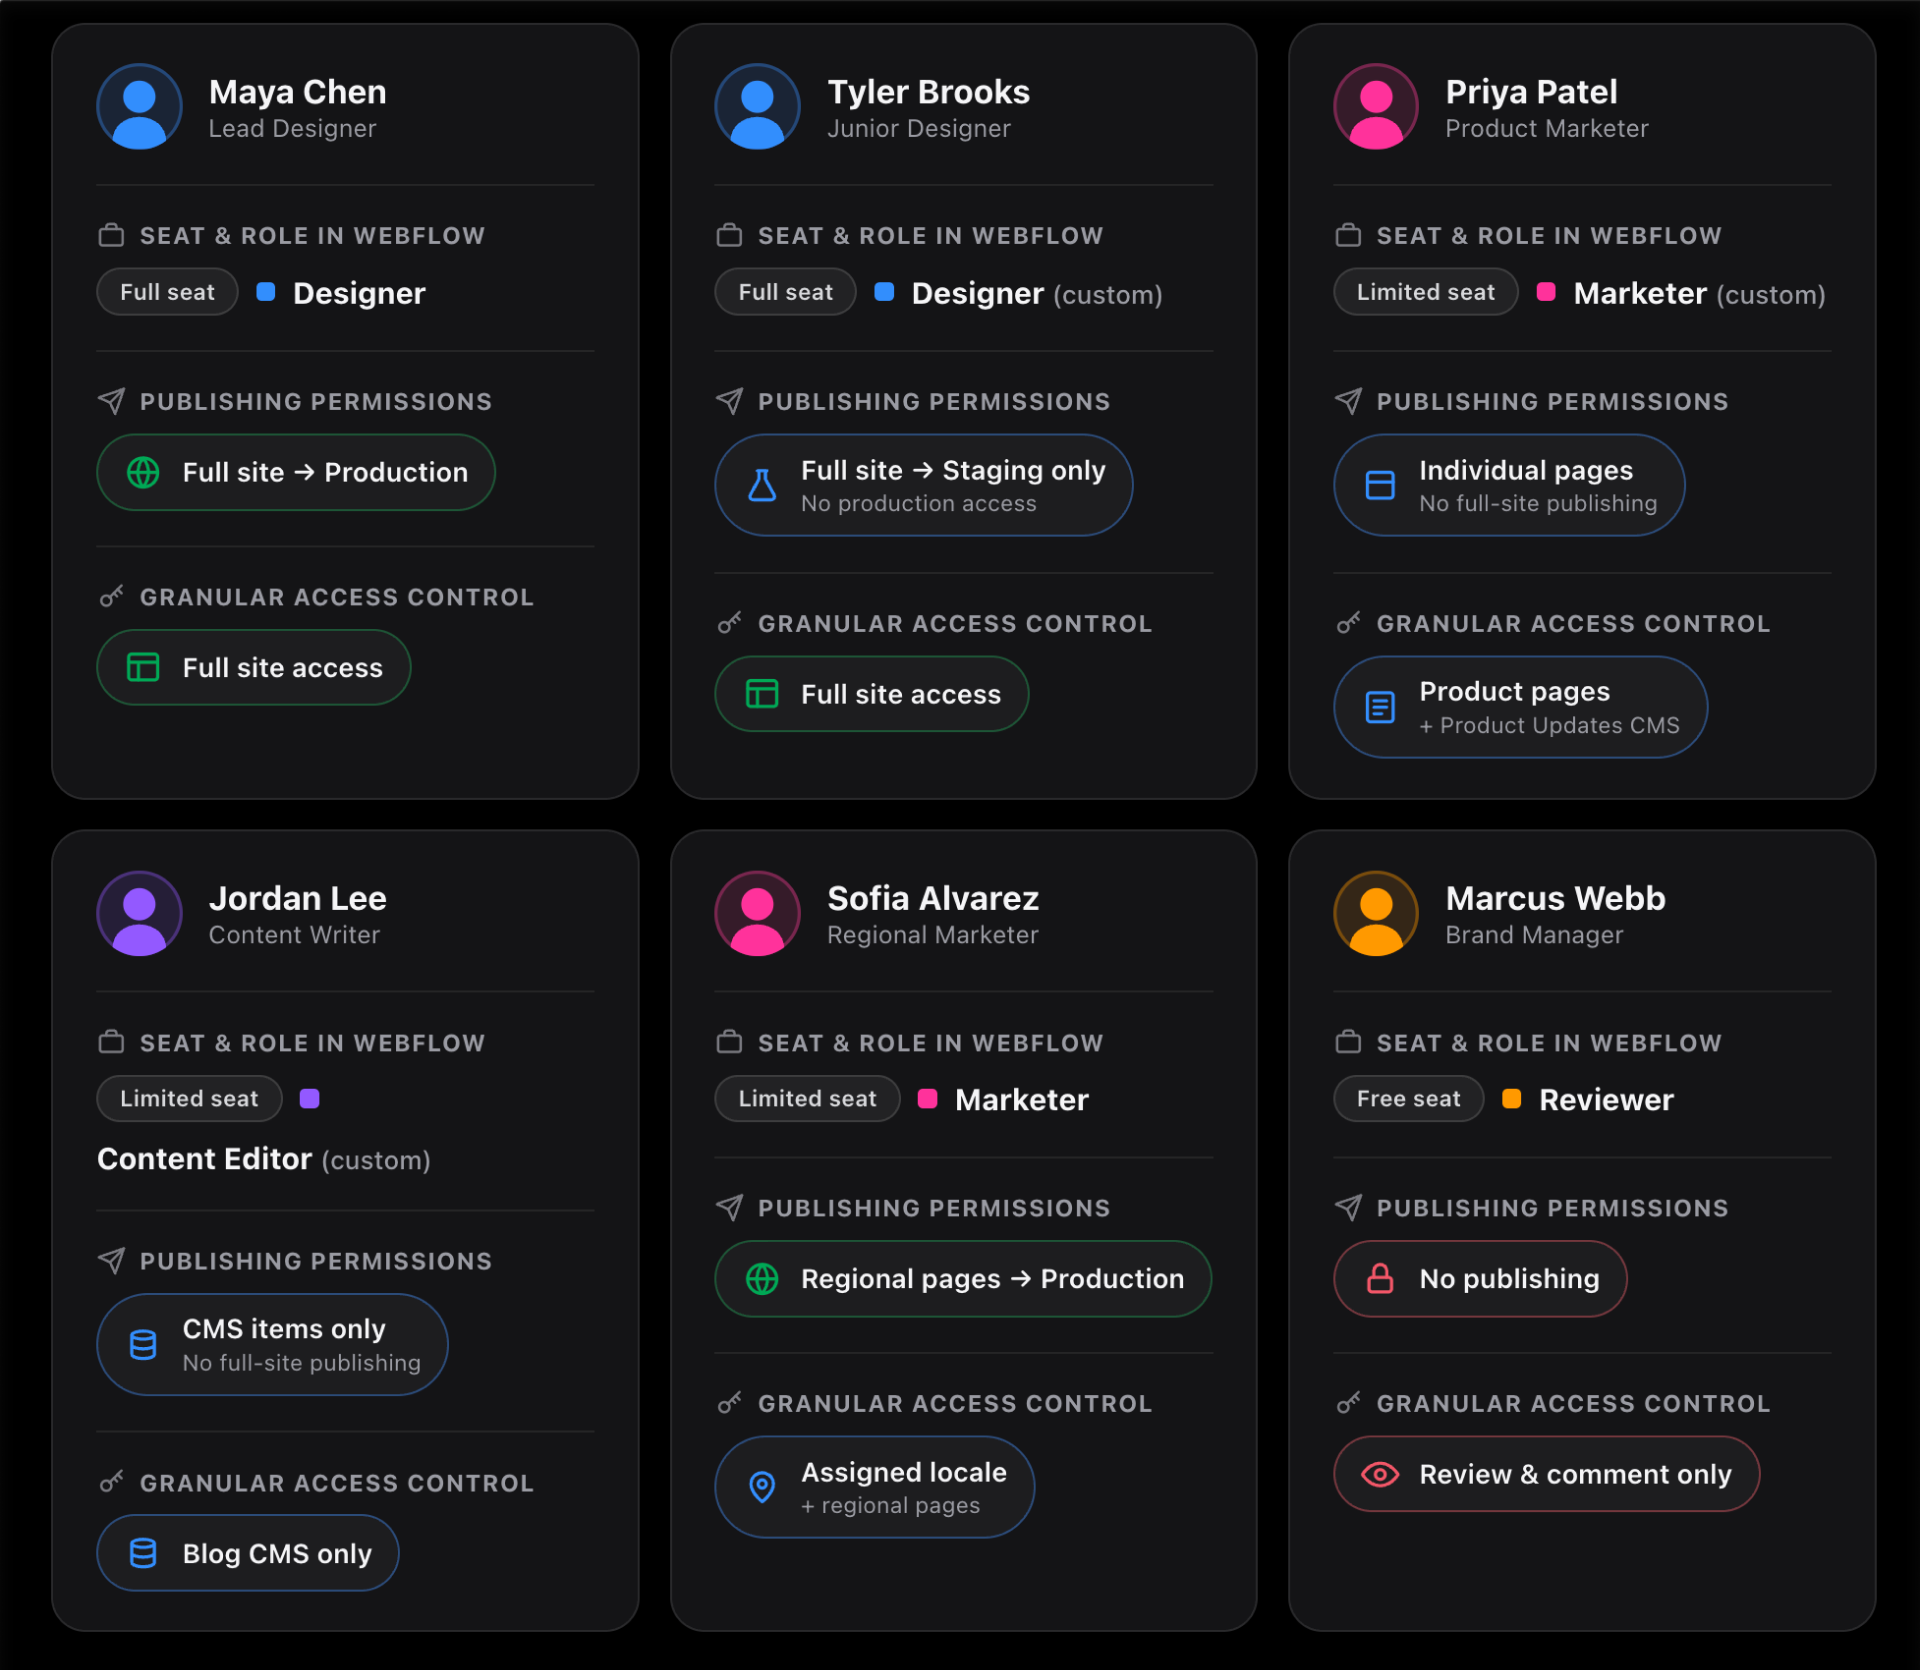
Notice that not everyone needs a custom role, and not everyone needs granular access. The goal is to use the simplest setup that accurately reflects the work each person owns.
Keep access right-sized
The goal isn't to give someone as little access as possible. It's to give them enough access to do their job without opening up more than they need.
Too wide
When access runs too wide, people can make changes outside their area of responsibility.
Example: someone with broader design access than they need might delete components that appear unused, not realizing they're being saved for an upcoming redesign.
Too narrow
When access runs too narrow, work can get blocked and bottlenecks can form.
Example: A Content Editor who can't access the CMS collections they're responsible for may have to route every small copy change through the design team instead.
Both problems come from the same mismatch: the access doesn't reflect the job.
A good rule: start with the access someone needs for their current responsibilities, then adjust it deliberately as those responsibilities change.
Don't forget offboarding
Access management doesn't stop after someone joins the team. When someone leaves or changes responsibilities, update their access promptly. That might mean:
- Removing them from the Workspace
- Changing their Workspace or Site role
- Updating the pages, collections, or locales they can access
- Removing access through your identity provider if your team uses SSO
The same principle applies throughout a teammate's lifecycle: their access should reflect the job they have now.
Managing your team at scale
As your team grows, managing everyone one at a time can get tedious. Enterprise admins can update multiple people at once, including:
- Search and filter members by role, seat type, or status
- Change roles for multiple members at once
- Update site access in bulk
- Remove multiple members or pending invites
- Export Workspace Member and Site Access lists to CSV
.png)
This is especially useful when you're reorganizing a team, updating access after a launch, or cleaning up permissions across a large Workspace.
Ready to continue?
You've now seen the full workflow and the habits that keep it working well as your team grows. Next, we'll wrap up with a few additional resources to keep handy.