Plan your migration
The CMS structure you've planned so far works whether you're starting fresh or bringing in existing content. For a migration, you'll also compare the source with that structure, work through anything that doesn't match, and decide what needs to move first.
The migration scenario
Imagine you're moving customer stories from another CMS into Webflow. Each exported record includes a story title and body, a customer name, and an industry. You've downloaded the customer logos separately, and they're stored in a folder on your computer.
Your planned Webflow CMS uses separate Customer Stories, Customers, and Industries Collections. So each source record contains information for a Customer Story item and the Customer and Industry items it needs to reference.
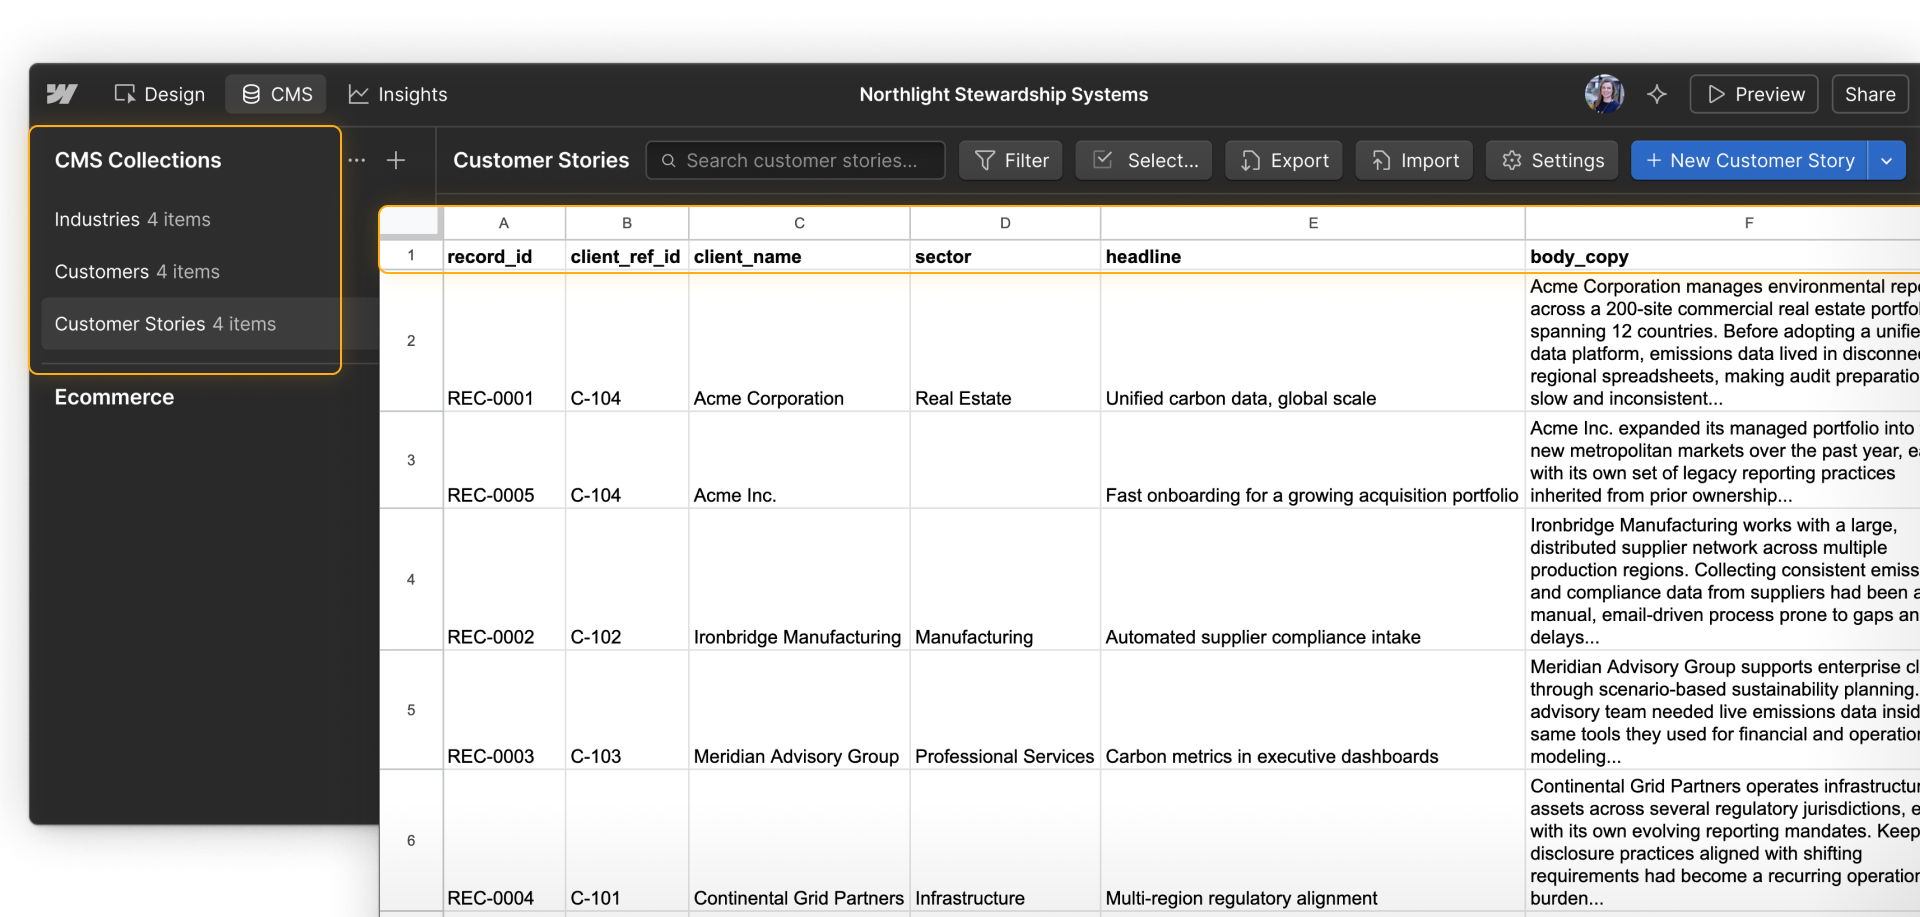
Compare the source with the destination
Before mapping fields, answer three questions:
What does each record include?
Here, one source record has the title and body for a Customer Story item. It also names the Customer and Industry items that story should reference. Identify which values belong to each Collection before you map them.
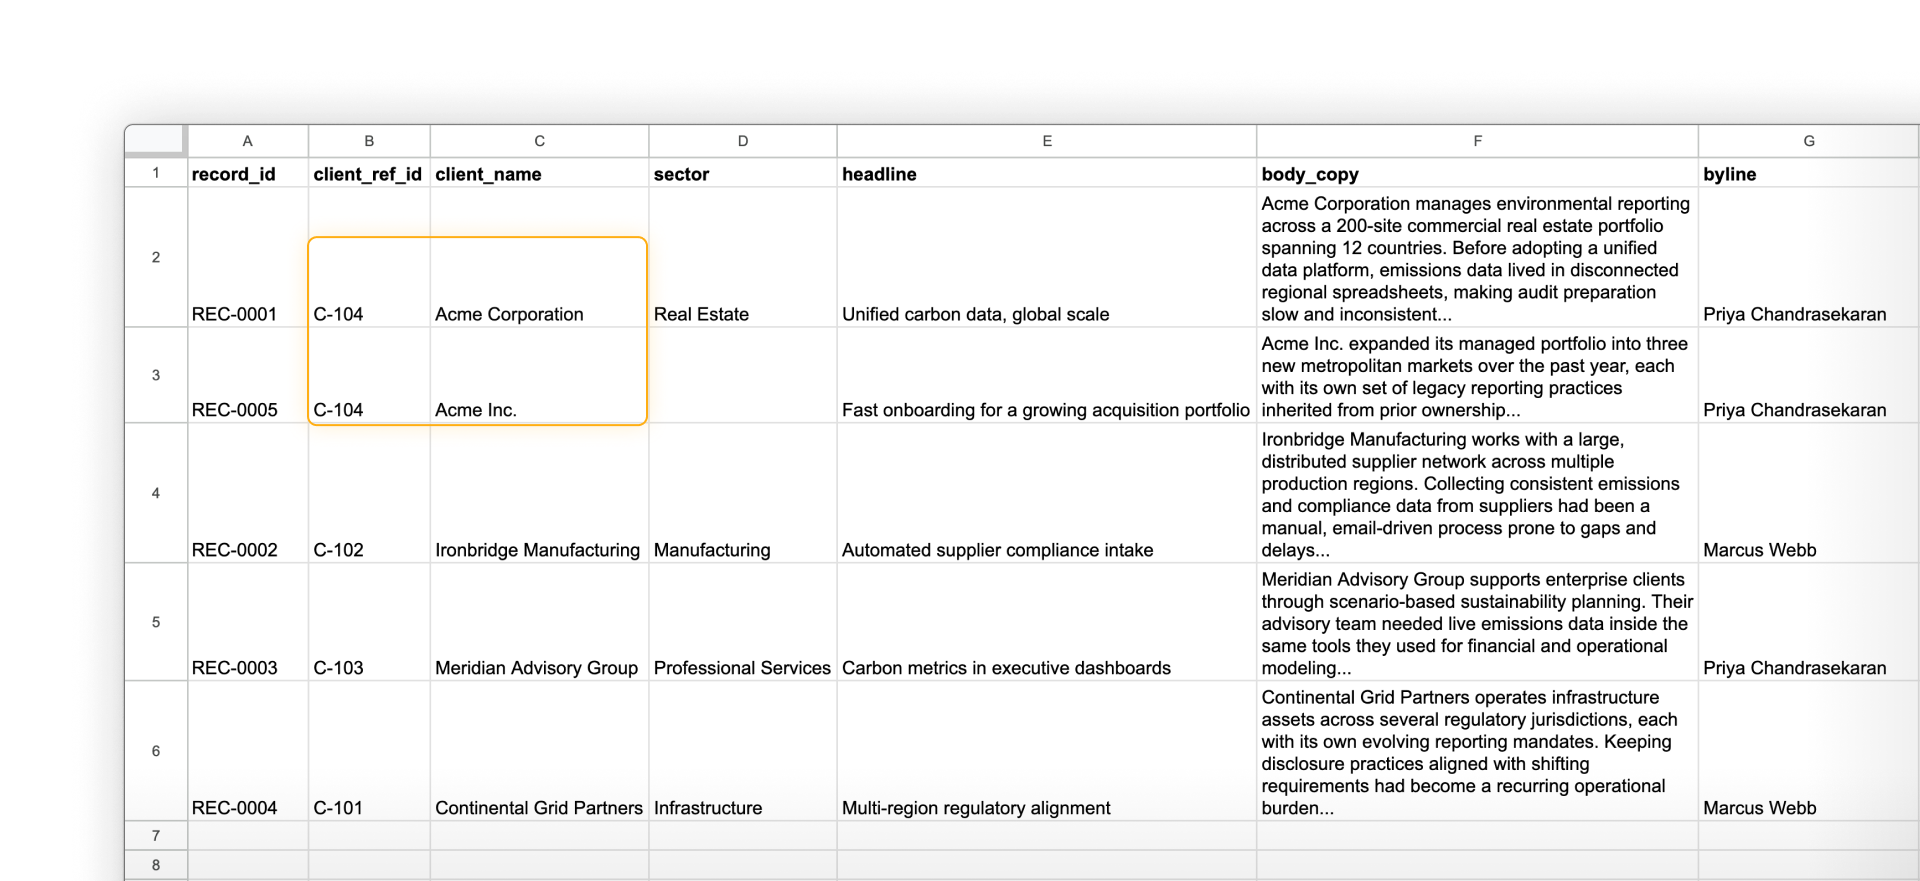
How will your agent match records?
Names may repeat or appear in different forms. If one record says "Acme" and another says "Acme Inc.," your agent might create two Customer items for the same company. Look for a source ID, canonical URL, or another value that stays unique across the export. If there isn't one, ask your agent to flag possible matches for review.
How will you fill each destination field?
Once you understand what the source contains, decide how each field in the planned CMS will be filled. Most will follow one of four paths:
Map it directly
The story title and body already have matching fields on the Customer Story item.
Restructure it
Customer and Industry values become items in their own Collections. The Customer Story item then references them.
Create from existing
Your agent can draft a summary from the story body for your team to review.
Find or flag it
A publication date or customer website may require another source. If the agent can't verify the information, leave the field for your team.
Test rich text before migrating
Long-form content like a customer story or blog post body may have a clear destination without being ready to move as-is. If a source body contains HTML, test one record before migrating the rest.
Use a test record that includes the kinds of formatting found across your source content. Check the draft in Webflow, adjust your instructions if needed, and then continue with a small batch.
Webflow Rich text imports use HTML. Source HTML may still contain formatting or platform-specific content that needs review.
Plan how images will move
Check how the export identifies each image. A stable public URL can often map to a Webflow Image field. A filename or local path needs to be uploaded somewhere your agent can access.
Here, acme-logo.png is stored on your computer. One option is to upload the logos to Webflow's Assets panel to give each file a public URL. Your agent can use those URLs to match each logo to the correct Customer item and populate its Logo field.
Check images inside Rich text fields too. Keep source URLs that will stay stable after the migration. Otherwise, upload and reconnect those images as part of the move.
Plan for image updates
Uploading an image to the Assets panel gives your agent a public URL for the migration, not a live connection to the CMS. If you replace the image in the Assets panel later, the image already added to the CMS item won't update automatically. Other hosting setups may behave differently, so confirm how future image replacements should be handled.
Test a few images before continuing. Confirm that each one matches the correct CMS item, displays as expected, and doesn't create unexpected duplicate assets.
File access varies by agent and setup. Before migrating, confirm which source files your agent can access.
Plan connected content in order
Customer Story items can't connect to Customer and Industry items until those items exist. For this migration:
- Create or confirm the Customers and Industries Collections, then add the Customer and Industry items.
- Create or confirm the Customer Stories Collection and its reference fields.
- Bring in the Customer Story items and connect each one to the appropriate Customer and Industry items.
- Check a few migrated stories before continuing with the rest.
Ask your agent for a migration plan
Give your agent the source content and the planned Webflow structure, then ask it to compare them and propose a plan:
Help me plan this migration. Explain what each source record contains and which Webflow Collection items its values belong to. Tell me how you'll find existing items without creating duplicates. For each destination field, explain whether the value can map directly, needs to be restructured, can be created from existing content, or needs review. Include the order for connected Collections and a plan for local files.
Include at least one source record with missing information or inconsistent naming in the test. Those examples are more likely to reveal what the migration plan still needs.
On to the build
Click Continue to next lesson to see an agent plan, test, and carry out a CMS migration through Webflow MCP.