Resources & activities
Key takeaways
Intro to the Webflow CMS
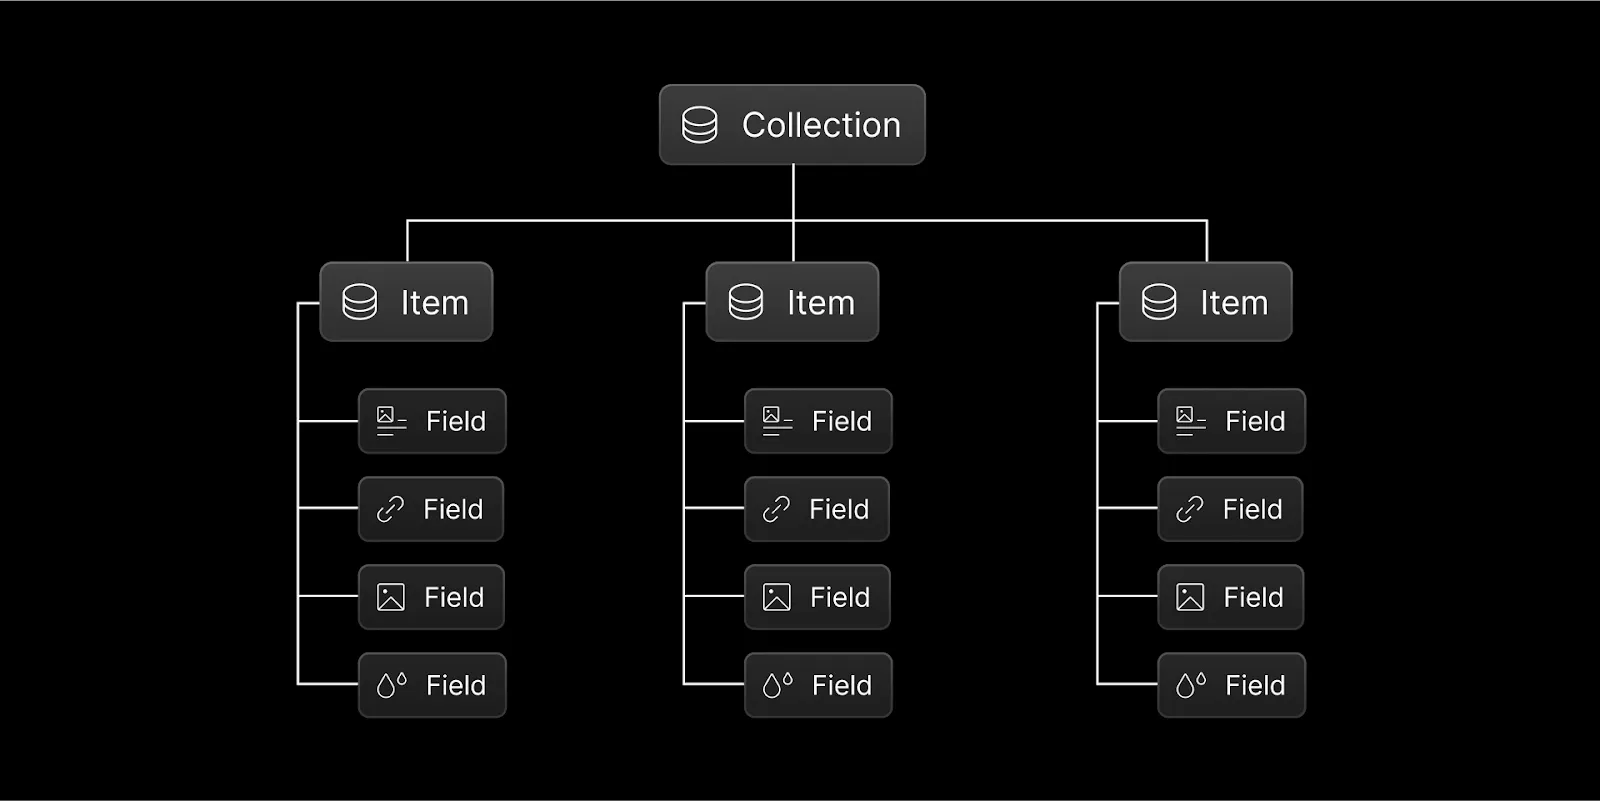
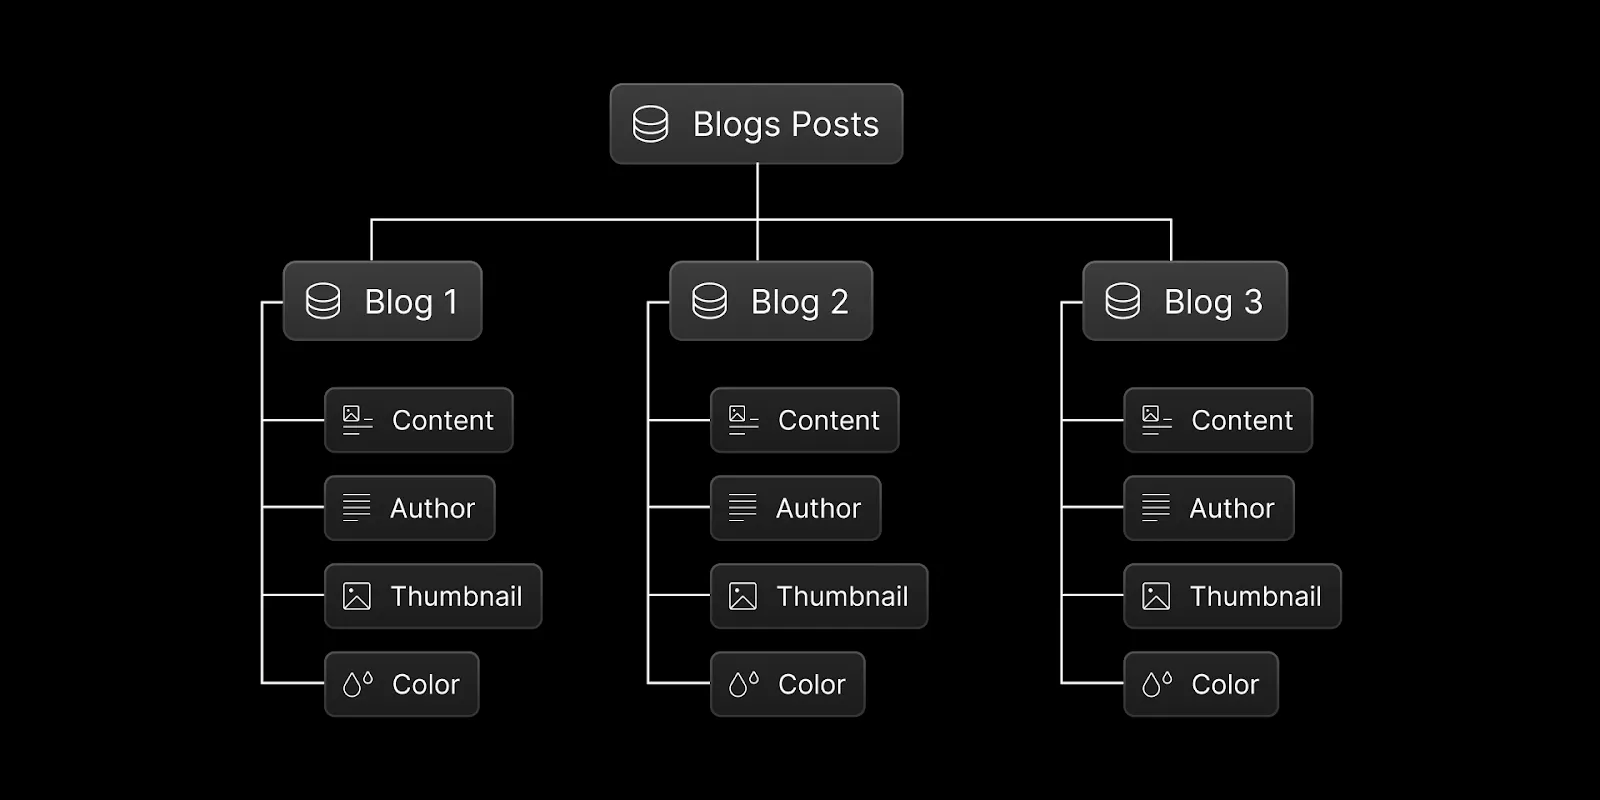
The Webflow CMS helps you manage and scale your website’s content. Unlike static content, when you make changes to dynamic content it automatically updates everywhere it’s referenced. CMS Collections define databases. Collections contain Collection items, which are individual entries with their own content. Inside each Collection item are Collection fields, which are customizable properties defined by the Collection.

Building, managing, and publishing CMS content
Webflow's CMS lets you create custom Collections (like a blog or product list) with tailored fields for each item (e.g., image, author, publish date). Once the Collection is set up, you can add, edit, and organize items. You can publish content immediately, schedule it, or queue it for later publishing. You can also manage large amounts of content at once using bulk editing, CSV imports, or Webflow’s APIs.

Additional resources
Check out additional resources related to lessons in this section.
- Intro to the Webflow CMS
- Static vs. dynamic content
- Collections overview
- Collection items overview
- Save and publish Collection items
Practice activity: Create a Blog posts CMS Collection
It’s time to put your knowledge into action! Practicing what you’ve learned is the best way to reinforce your skills, build confidence, and understand how Webflow works.
In this activity, you’ll practice creating a Blog posts Collection with a Field for content and, optionally, add your first blog Item.
You must be in Design mode to complete this activity. Tip: if you don’t have access to Design mode in your team workspace, switch to your personal Starter workspace.
Instructions
STEP 1: Locate CMS Collections - From any site, including a blank site, in the top left corner of Webflow, locate and click the CMS Collections icon. Next, click the plus sign (+) next to CMS Collections.

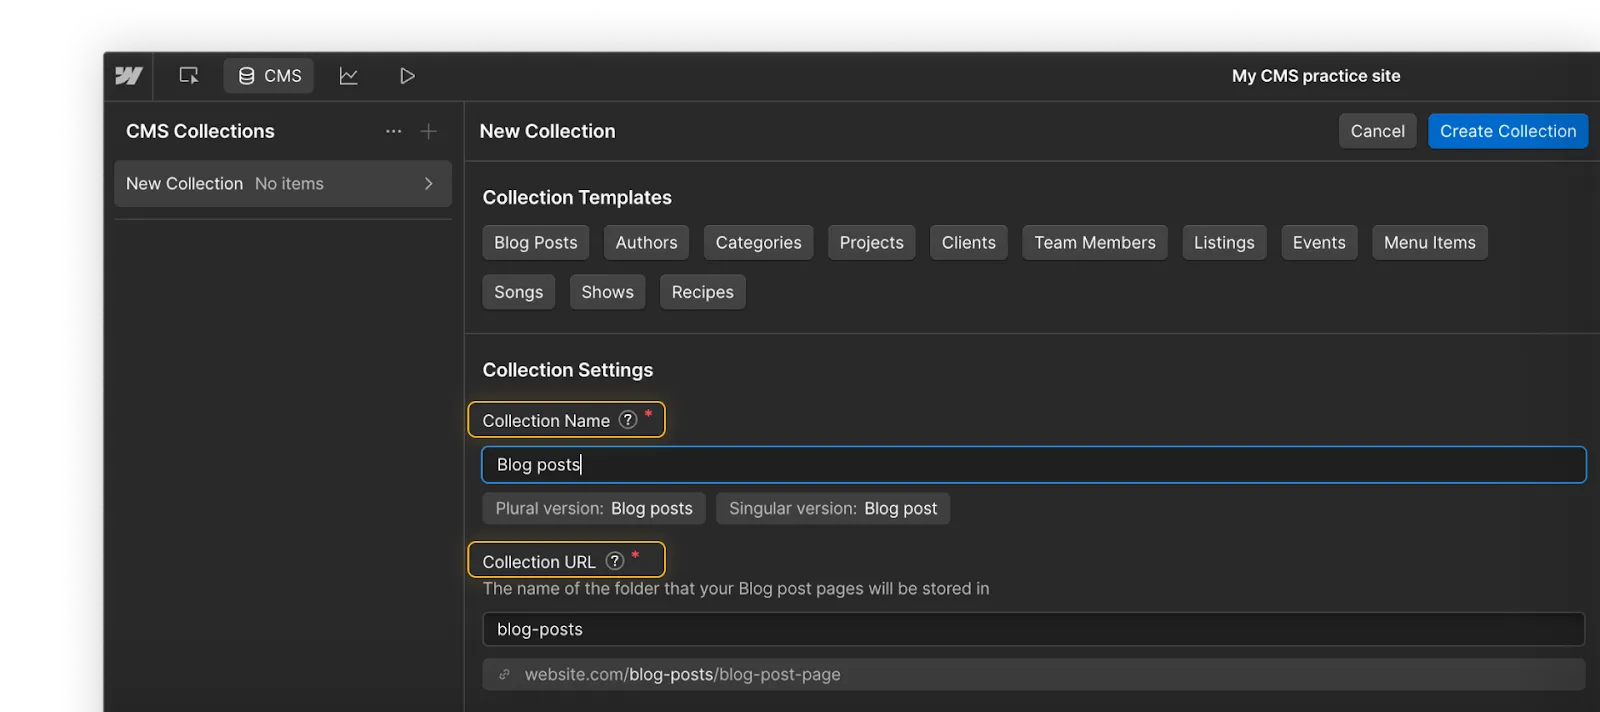
STEP 2: Create a Collection - Add a Collection Name and Collection URL. You can use the given information below or create your own.
- Collection name: Blog Posts
- Collection URL: blog-posts

Initial Create Collection workflow showing Collection name and URL.
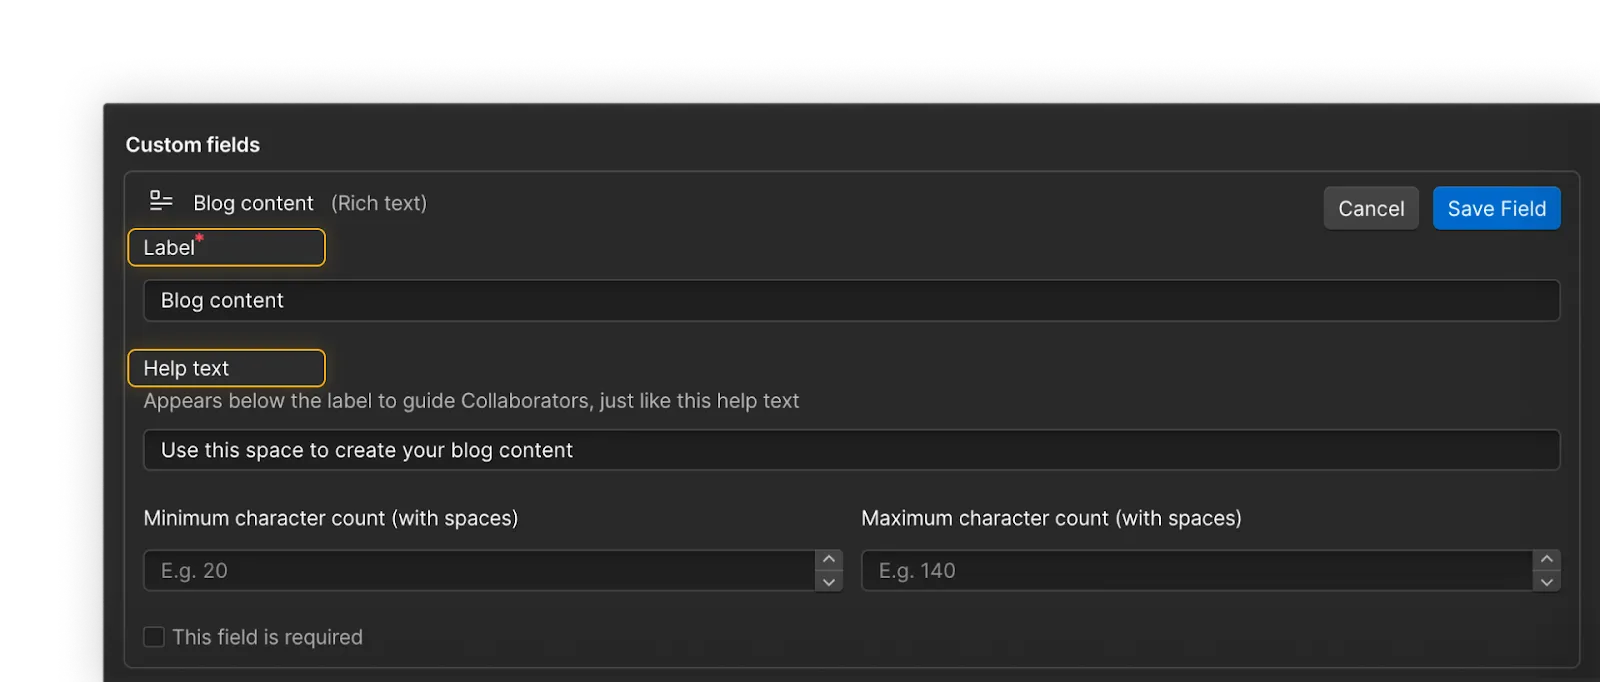
STEP 3: Add a new Field - Click + Add new Field. You will create a Field for your blog text content. You can use the given information below or create your own.
- Field type: Rich text
- Label: Blog content
- Help text: Use this space to create your blog content.
When you’re finished with this step, click Save Field.

STEP 4: Finish creating your Collection - At the top, be sure to click Create Collection to add the collection to your site.
Keep going
Feeling confident? Here’s what you can do next:
- Add more fields - Add additional custom fields of various types to display things like your blog author, thumbnail, etc.
- Complete and publish your first blog - With your new Blog posts collection ready to go, add your first Item – an individual blog post! Follow the prompts in Webflow to get started.
Ready to learn more? In the next section, you'll learn about SEO and accessibility in Webflow. Click Complete & continue in the Course progress box on the right to move on.