Key terms & animation concepts
Animation terms you’ll use everywhere
Animation has its own language, and once you know it, you start seeing similar terms everywhere. Once you learn the basics, you’ll start seeing the same ideas everywhere. Triggers, targets, timing, and easing appear in most motion tools, from After Effects to Rive to Spline. The names might change a little, but the concepts stay the same.
Basic concepts
Trigger: What starts the animation. Common triggers include page load, scroll, hover, and click.

Target: The element or group of elements you want to animate. You can target by class, individual element, attribute, or a custom selector. You can also target “any element” within a specific scope, like elements inside another element.
Tip: When you target by class, your interaction stays linked to that class. If you rename the class, the target name in your interactions updates too.
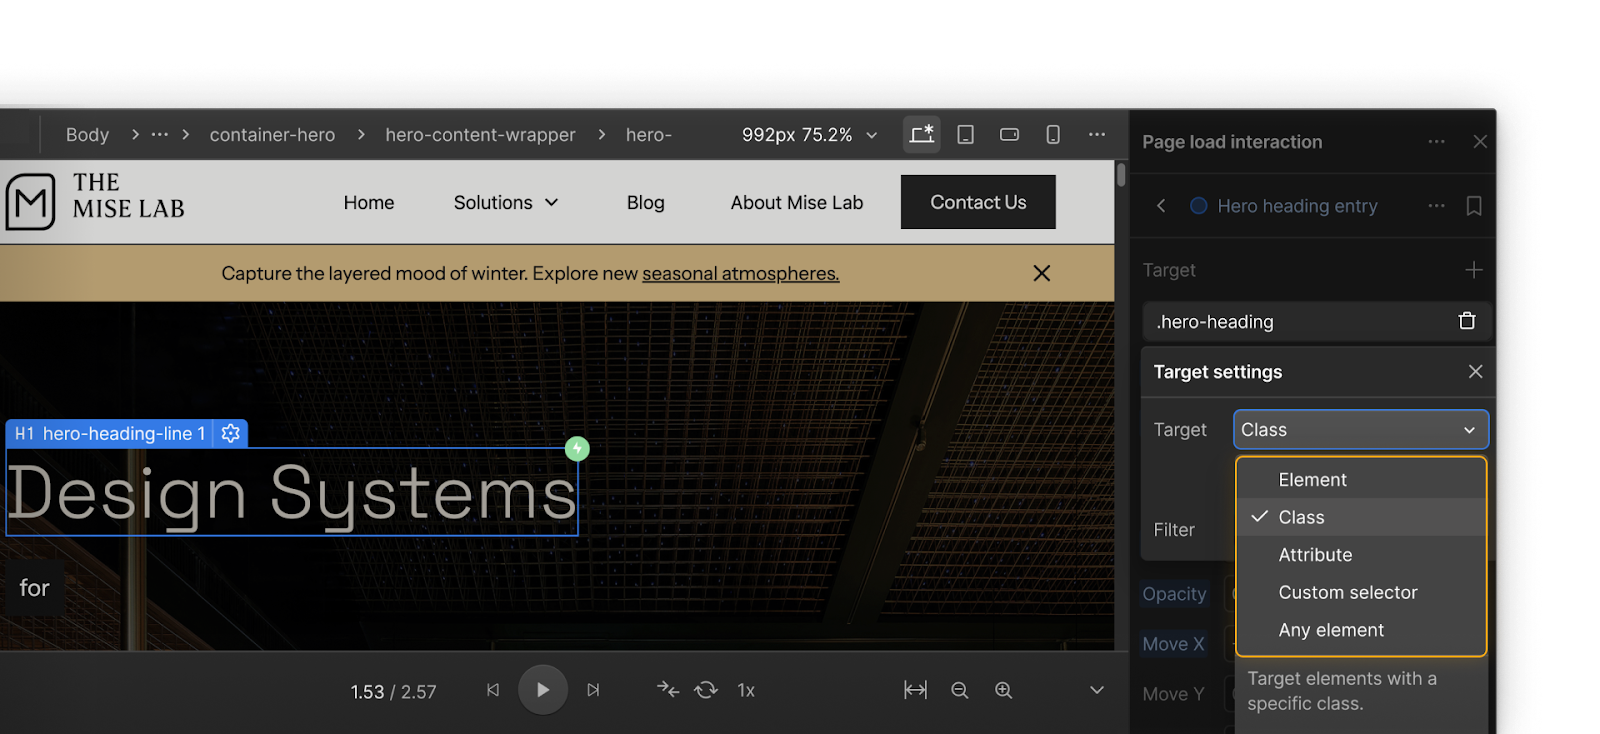
Filter: Controls which elements are included when you target a class, element, or selector. You can narrow the animation to elements within another element, siblings, or items that contain another class. Filters help you control how motion flows across your layout.
Action: What happens to your target. Actions can control one or more properties at the same time, such as fading and moving together. You can also stack or sequence actions to create smooth, layered motion.
Learn more about triggers, targets, actions, and animations.
Timeline concepts
Timeline: The visual area where you arrange and fine-tune actions. You can adjust start times, durations, and overlaps, and drag items to refine pacing.
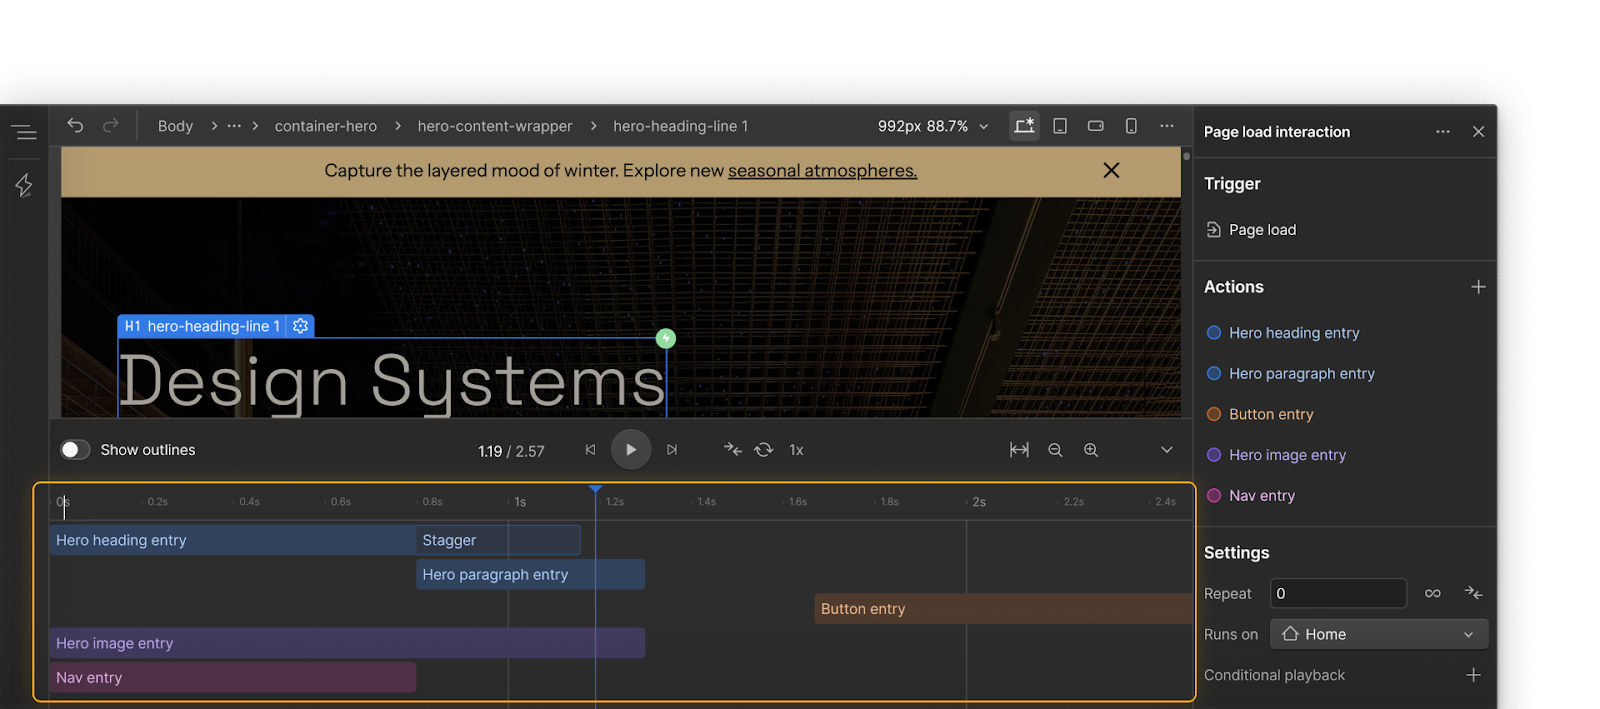
Duration: How long a single action lasts. Short durations feel snappy. Longer durations feel calmer.
Delay: A pause before an action starts. You can use it to create anticipation or make space between moments.
Overlap: When one action begins before another ends. Overlap helps motion feel connected and natural.
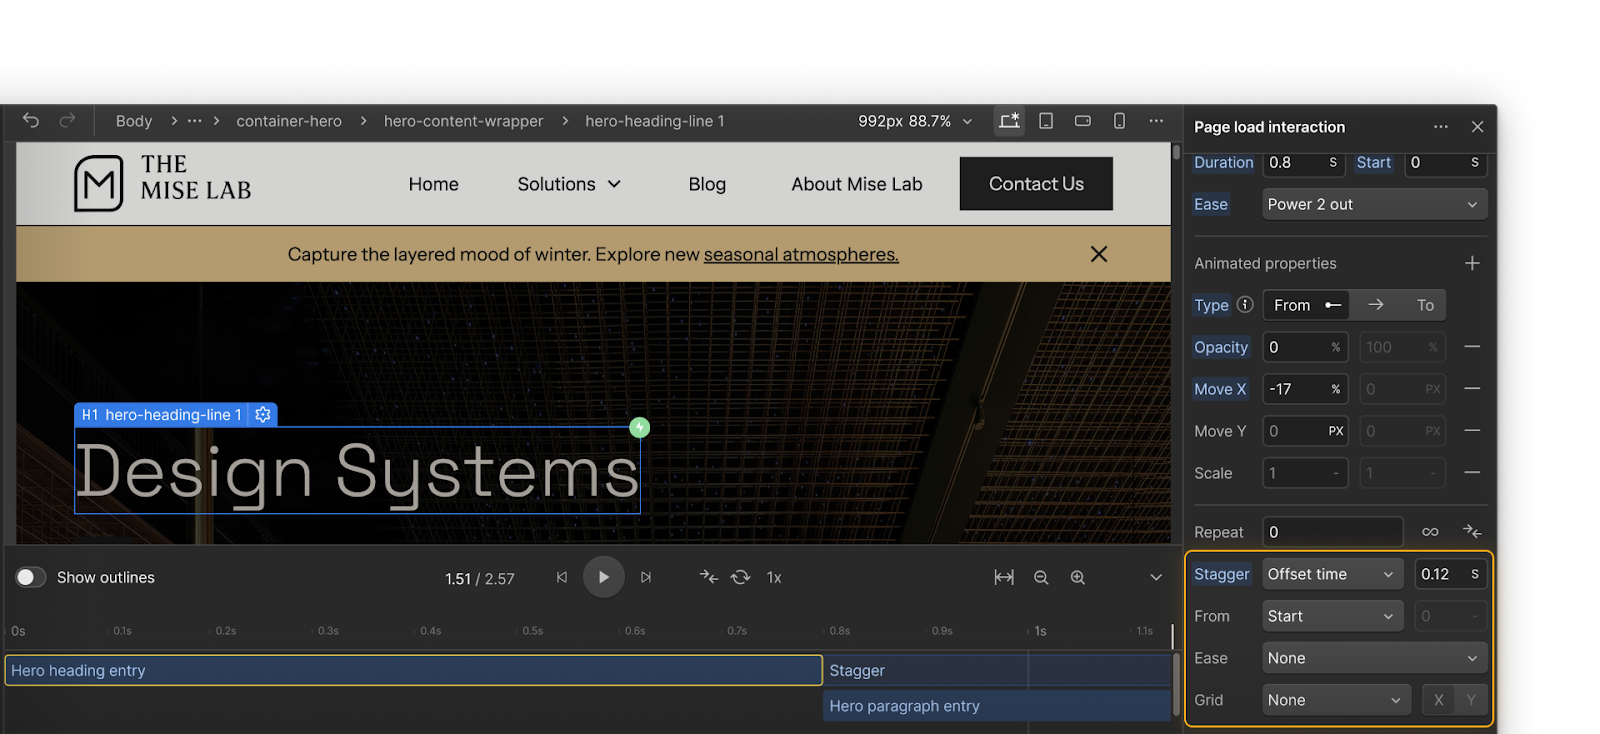
Stagger: Offsets timing across multiple elements within a single action. Great for lists, cards, or split text reveals.
Learn more about the interactions timeline.
Animation types: From, To, and From–To
From, To, and From–To describe how an animation defines its start and end values, not the direction it moves in. Think of them as ways to tell Webflow where an animation begins and ends.
- From starts with the values you set and ends at the element’s current state. Use it for entrances, like fading in and moving upward.
- To starts from the element’s current state and animates toward new values. Use it for exits or transitions to a new position.
- From–To lets you define both starting and ending values. Use it when you want full control, such as looping or continuous motion where you need precise start and end points.
Tip: Choose the setup that fits your story. For entrances, From often feels more natural because content appears and settles into place.
Easing
Easing controls how an animation speeds up or slows down. It shapes the motion’s personality, changing how it feels to the viewer. Smooth easing often feels natural and polished, while sharper curves can make motion feel energetic, snappy, or even robotic.
Using the same easing across related animations helps your design feel intentional and connected.
Common choices
- Ease out for entrances. Starts fast and slows as it lands.
- Ease in for exits. Starts slowly and accelerates away.
- Ease in out for movement that begins and ends gently.
Tip: Try experimenting with different curves. Notice how each one changes the personality of the animation.
Learn more about interpolation, easing, and smoothing.
Extra: working with text
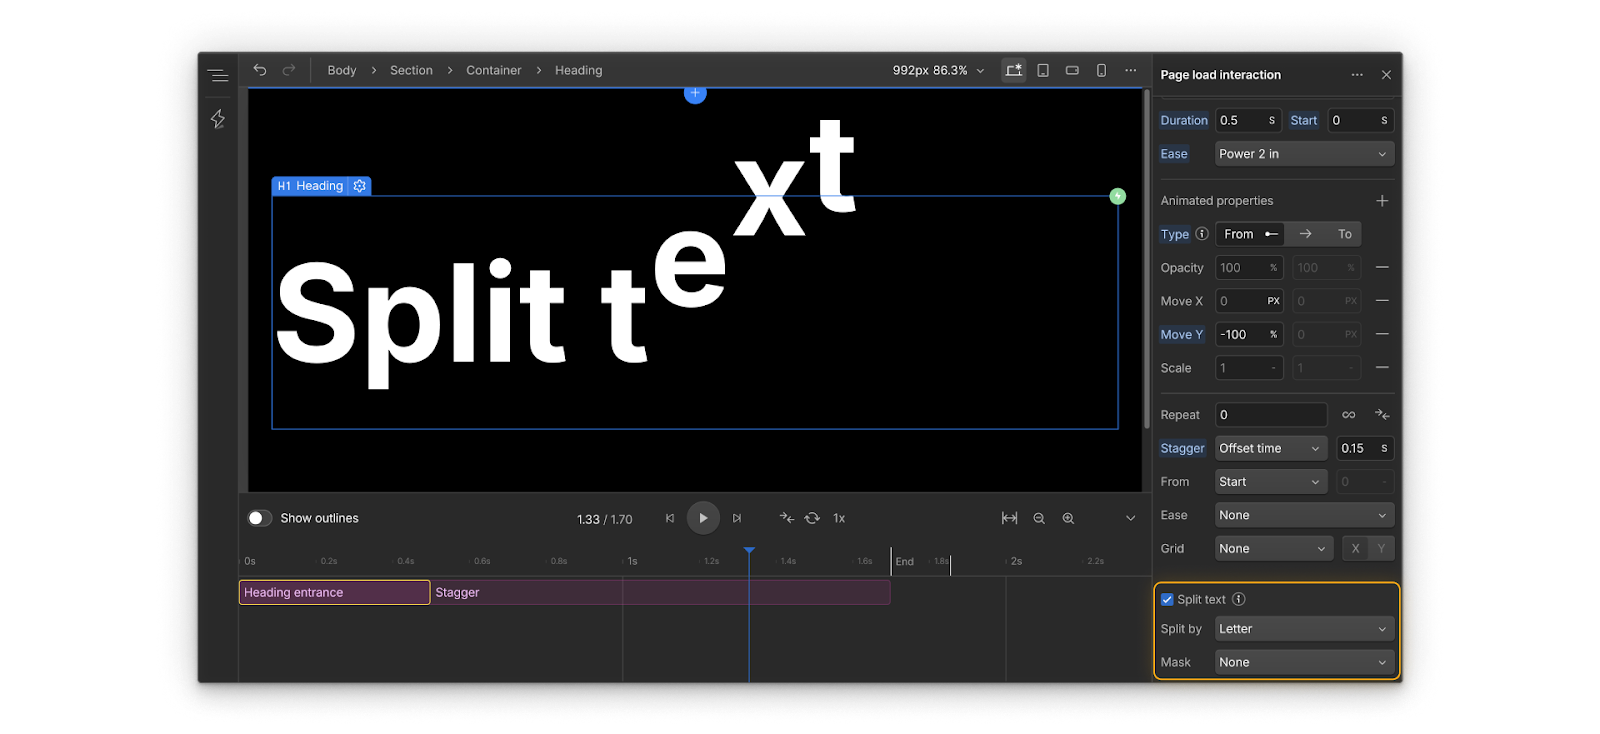
Split a text element into words or characters so you can animate each piece with staggered timing. This is perfect for headlines that reveal word by word or letter by letter.
Ready to build?
Now that you have a solid foundation, it’s time to dig in and build a GSAP-powered interaction step by step. Click Complete & continue to move on.