Tracking & consent
Why tracking comes first
Tracking is the foundation that makes Optimize work.
Optimize relies on visitor behavior to understand what people see, what they click, and whether they complete the actions you care about. Without tracking, Optimize can’t collect the data it needs to run optimizations or report results.
Tracking is shared infrastructure across both Webflow Analyze and Webflow Optimize. Turn it on once at the site level, and both products can use the data it collects.
Turn on tracking
You’ll manage tracking from your Insights settings.
Once visitor-behavior tracking is enabled, Webflow begins collecting data from your published site.
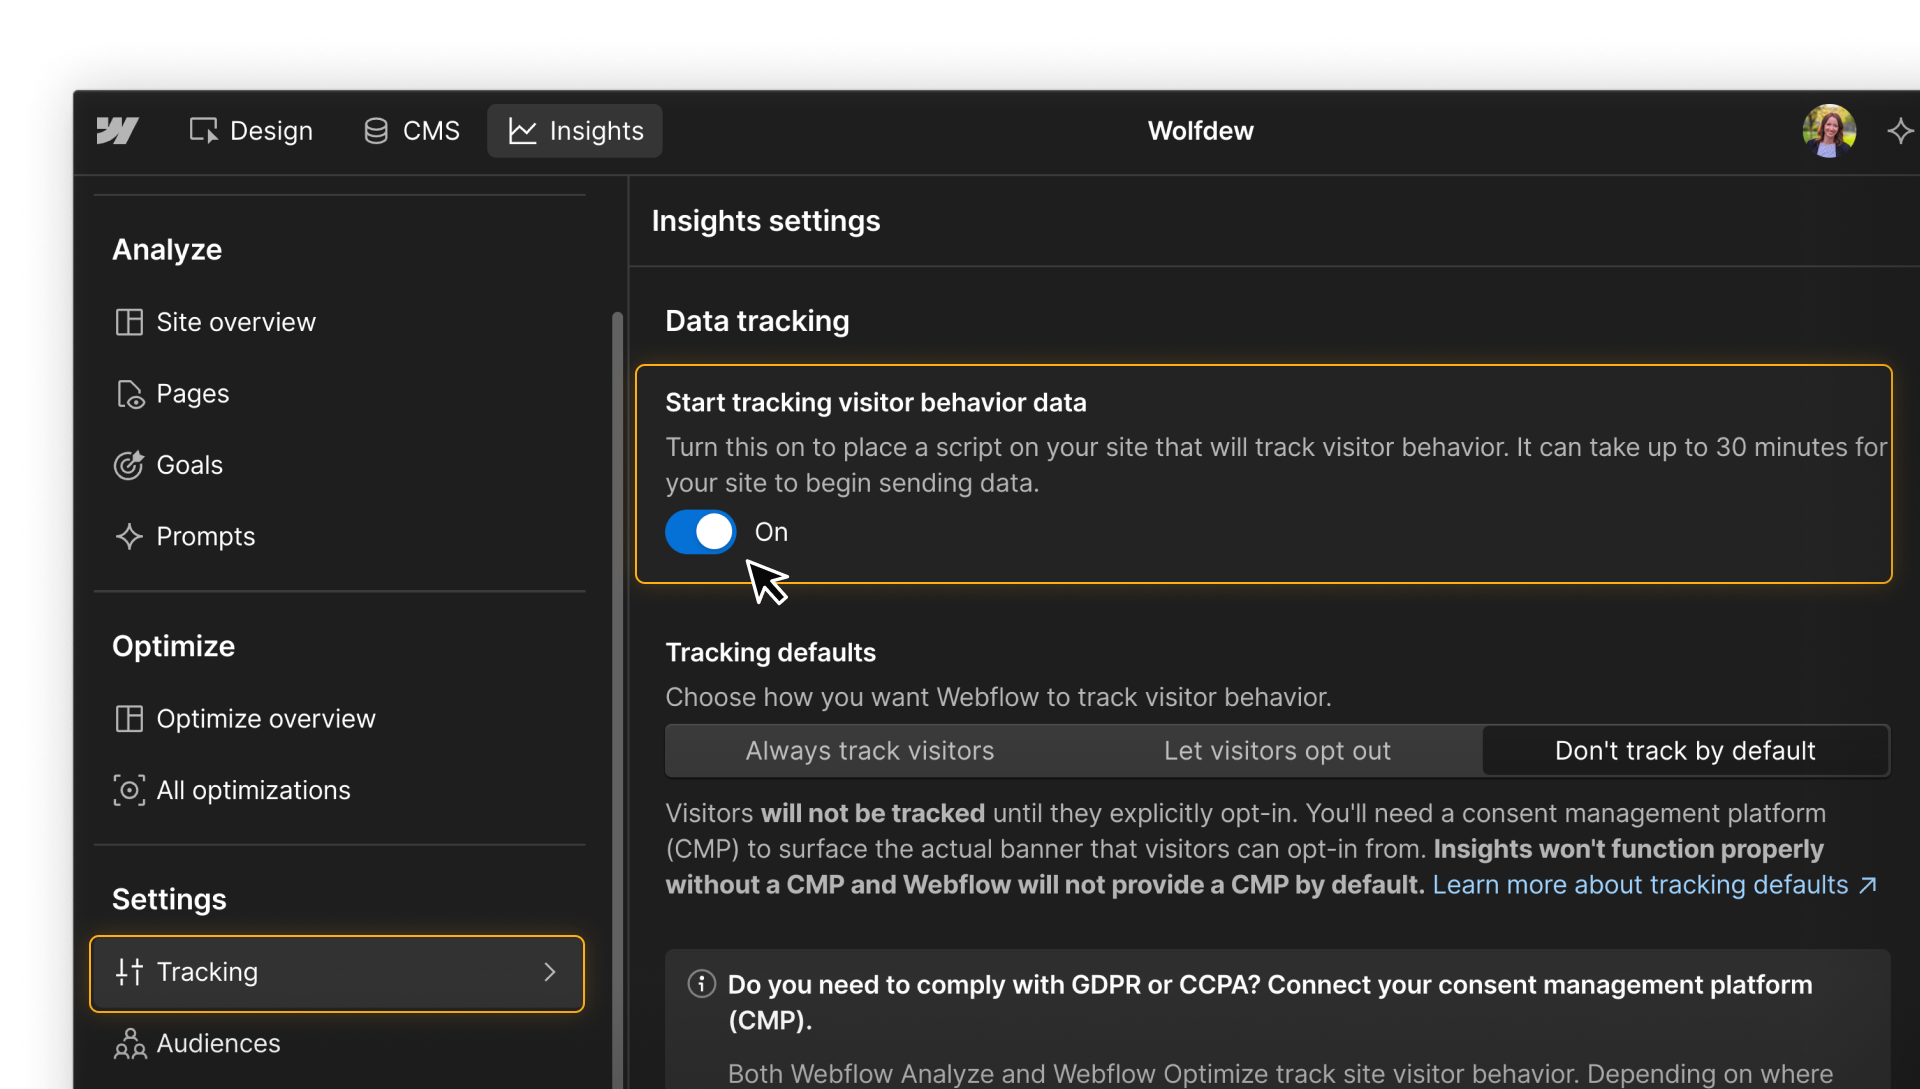
Keep in mind that it can take a little time for data to begin appearing after you turn tracking on.
You can also choose which domains and subdomains use Analyze and Optimize. Use Allowed domains to include each domain where you want tracking and optimizations to run. If you use a staging domain to QA an optimization before publishing it to visitors, make sure that domain is included too.
Choose how visitors are tracked
When you enable tracking, you’ll choose how visitor behavior is collected by default. There are three options:
- Always track visitors: Visitors are tracked automatically.
- Let visitors opt out: Visitors are tracked by default, but can choose to stop tracking.
- Don’t track by default: Visitors aren’t tracked until they opt in.
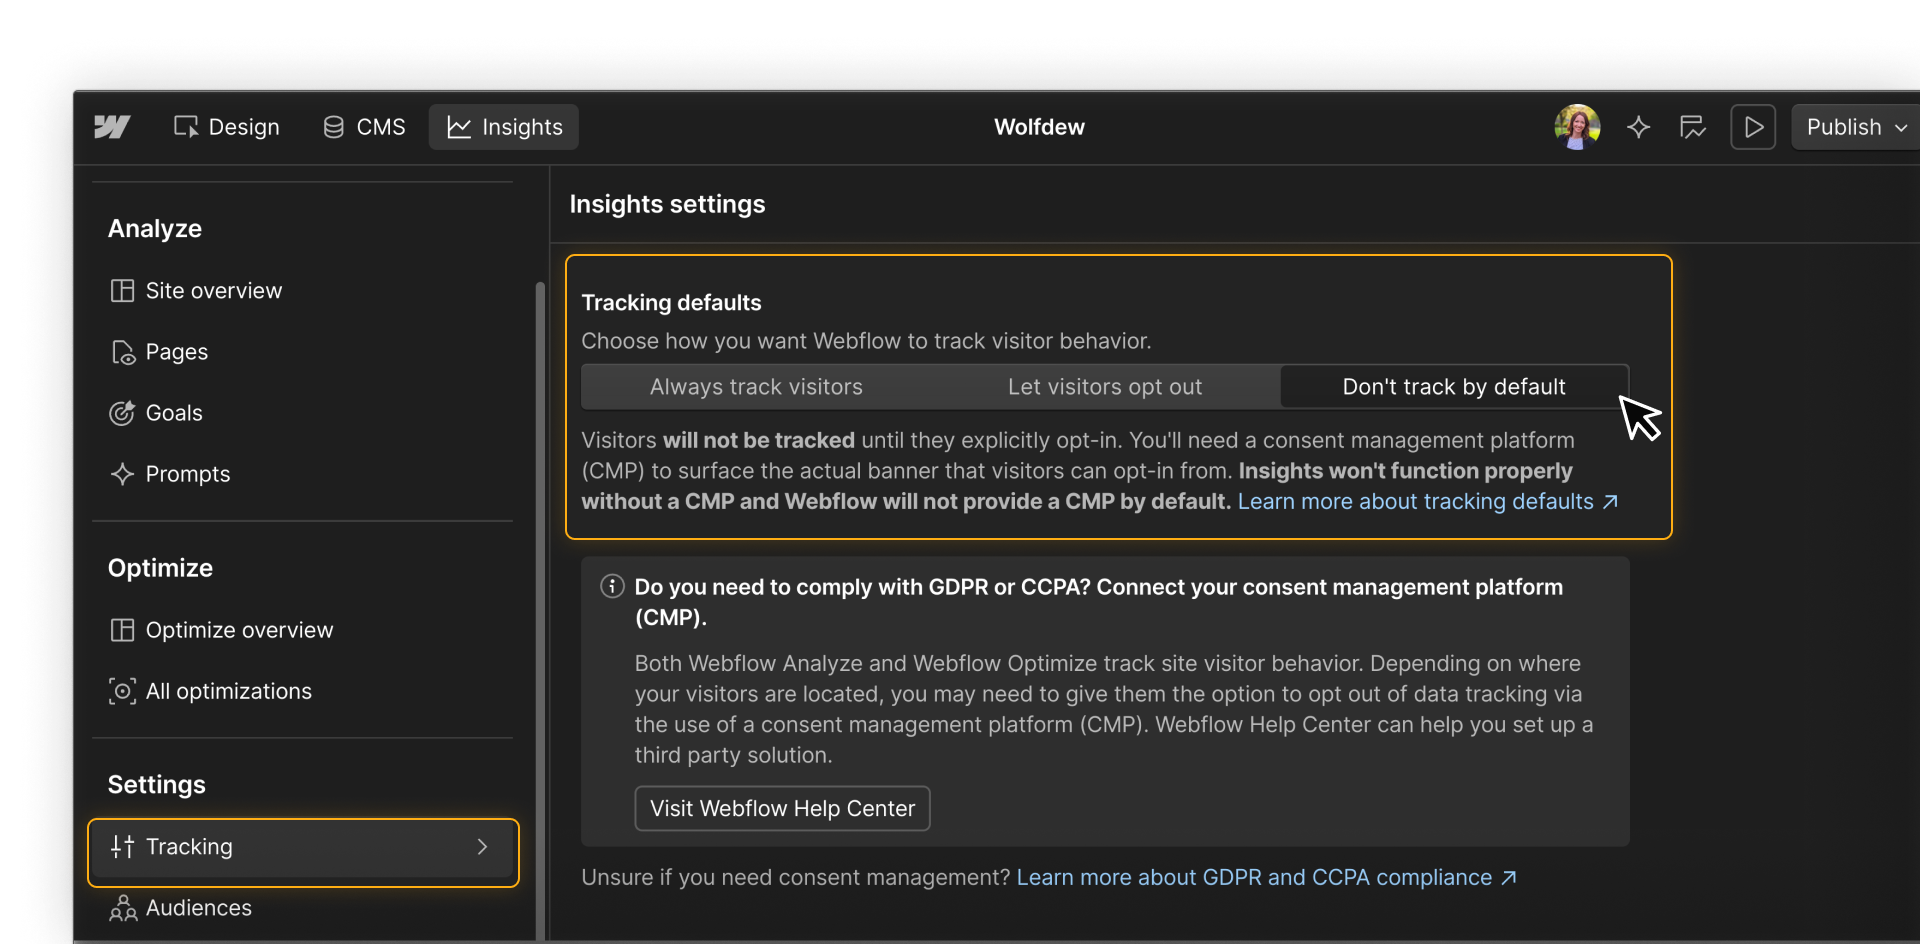
The right choice depends on how your site handles privacy and consent. If visitors need to opt in or opt out, they also need a way to communicate that choice. That’s where consent management comes in.
How consent fits in
A consent management platform, or CMP, can display a consent banner and adjust tracking based on a visitor’s preferences.
.png)
Depending on where your visitors are located, privacy laws may affect when you can collect visitor data and what choices you need to provide.
Because Analyze and Optimize share the same tracking infrastructure, the consent approach you use applies to both.
Webflow supports consent-management apps, integrations, and custom implementations. The exact setup depends on the tools your team uses, so refer to the Help Center for implementation steps.
Privacy requirements vary by jurisdiction.
This course explains how tracking and consent work in Webflow, but it isn’t legal advice.
Confirm data is flowing
Once tracking is enabled, confirm that your setup matches the domains where you plan to run optimizations.
If your site also uses Analyze, return to Insights and verify that visitor data is appearing for those domains. If you’re QAing on a staging domain, check that data there too.
This helps you catch setup issues before they affect the optimization data you rely on later.
Ready for more?
Now that tracking is in place and you know how consent fits into it, continue to the next lesson to learn how connected data can expand what Optimize can measure and target.