Workspace seats & roles
In this video, we’ll show you how to create and manage Workspaces for teams working together in Webflow. You’ll learn how to set up a new Workspace and add flexible types of seats—full, limited, or free—for your collaborators. Then, we’ll look at how to add team members and assign them the roles they need to do their part.
Video transcript
Workspaces in Webflow are how you organize your work and manage access for your team. Every Webflow account belongs to at least one Workspace, and all your sites live inside a Workspace.
There are two main types of Workspaces. Personal Workspaces are for individual use — they come with your account by default and are a good fit for freelancers or solo projects. Team Workspaces are designed for collaboration, with support for multiple members, roles, and permissions.
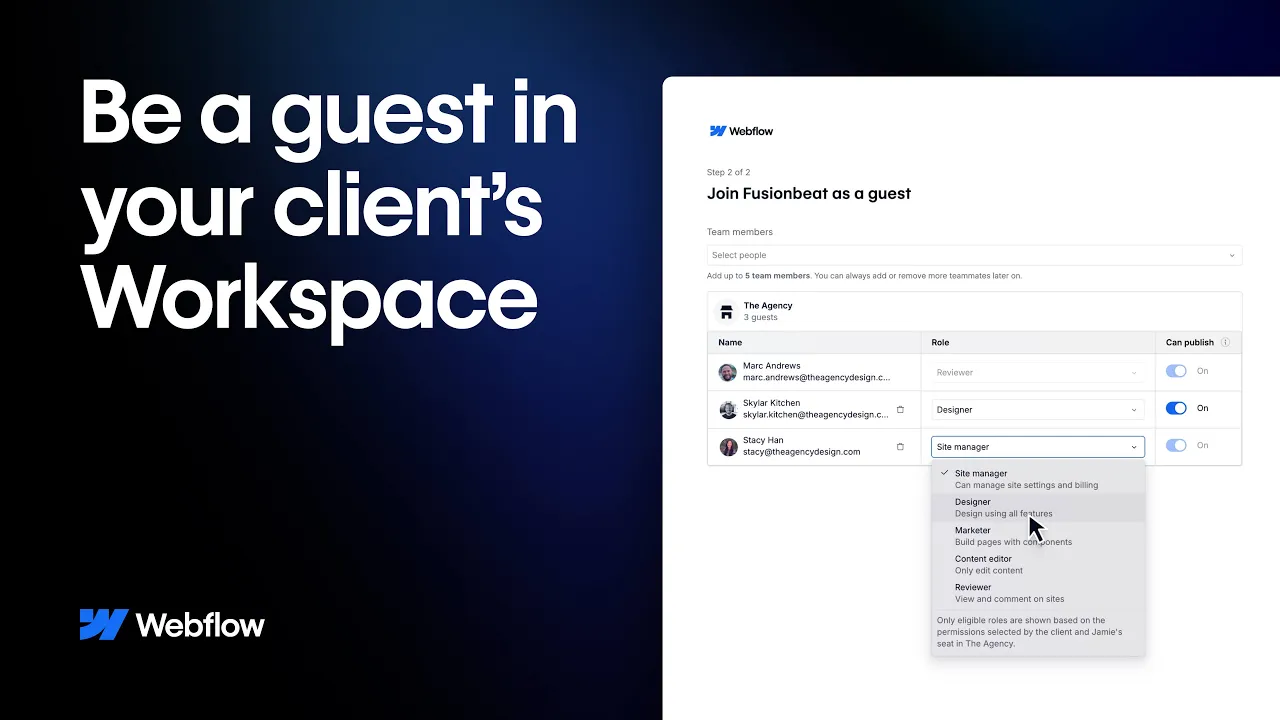
Within a Workspace, you can invite team members and assign them different roles. The main roles are Owner, Admin, Designer, and Content Editor. Owners and Admins have full control. Designers can build and edit in the Designer. Content Editors can only access the Webflow Editor, which is the simplified interface for updating content without touching the design.
You can also manage billing, site plans, and Workspace-level settings from the Workspace dashboard. Sites within a Workspace can have their own plans — so a Workspace with multiple sites might have some sites on a free plan and others on a paid plan.
If you're working with clients, it's worth understanding the difference between adding a client as a team member to your Workspace versus transferring a site to their own Workspace. In most client work, you'll want to eventually transfer the site so the client has full ownership.
That's a quick overview of Workspaces, seats, and roles. The Webflow Help Center has more detail on specific permissions and plan options.